Friday, October 29, 2010

Reader Question - Are there Two Sides to a Horse?

I received a question from Bill in North Carolina concerning his horse being better on one side than the other. Bill said his horse seems to be better and calmer on things approaching him or objects that he approaches on his left side than the right. Bill wanted to know if this was common and what to do about it.

Yes Bill, this is common, barring an eye injury or some physiological reason why your horse would have a hard time seeing out of the right eye. Best to get a Vet to look at your horse to confirm or deny a problem with the eye.

Much like the concept that people are either right brained or left brained, some horse trainers think that horses think differently on what they see either out of their right or left eye. While I don't think that's necessarily true or un-true, I do know that what you train your horse on on one side you need to do the other. I'll leave it to the experts to determine this right brain, left brain thing and how it applies to horse behavior and training.

You want your horse to be equally comfortable on either side. Approaching obstacles, like the one your horse spooks at; mounting either on the left side or the off side; and all other things you do with him.

I think it just makes sense to sack your horse out on both sides. Someone asked me once why I saddle, mount and dismount from different sides as opposed to doing it all on the left side. I said I just wanted my horse to be used to me doing things on both sides. Besides, what if you were on a steep trail with a drop off on your left and had to dismount for some reason? You wouldn't want to do it for the first time on that trail.

Wednesday, October 27, 2010

Handguns for the Trail


I received a comment on the Saddle Guns post from Glenn in J City, Missouri. "I don't want to carry a rifle, but I am thinking a handgun would be a good idea when trail riding. Sometimes I ride by myself and other times I ride with teenage children who I am nonetheless responsible for. What type of handgun do you suggest for carrying when riding?"

Glenn, assuming you are working within existing laws concerning carrying guns, I am an advocate of always carrying a gun. I prefer saddle carbines like the ones I covered on the post you commented through. Handguns are handy (that’s why they call them hand guns). I sometimes carry only handgun when it makes sense.

When I was a Army Range Rider, I carried several different handguns: Smith & Wesson .357 magnum revolver, Glock model 22 .40 cal, and Beretta 92F in 9mm - whatever was allowed at the time by my Agency. I generally carry a S&W .357 magnum handgun now, but sometimes I carry a single action revolver in .45 LC as the .45 Long Colt caliber is readily available in snake shot shells and blanks for training horses on gunfire.

I think you can get used to practically any handgun and but some more suited to others. I prefer revolvers. The good thing about a .357 magnum revolver is that you can shoot .38 Special cartridges in it which will have less recoil and noise. The good thing about a .45 LC is that the round is a better stopper on wild dogs or pigs and the shotshells allow you to stand back a bit more when shooting snakes.


Double action revolvers are easier to shoot and usually have better sights. Single Action revolvers have to be cocked and most single action revolvers have a sight channel cut into the top strap which is visible after cocking. Single actions are generally not the choice for precision shots. But I like them because of their simplicity, light weight, clean lines and because of their history. The handgun pictured is a copy of the Colt Single Action revolver.

I don’t think you can go wrong with either choice. Just have to make the decision on the caliber. Handguns are a good tool to have,..from personal protection against two and four legged varmints and snakes to having to put a horse down who has a broken leg or other severe injury and it unrecoverable. Safe Journey Glenn.

Sunday, October 24, 2010

Natural Horsemanship versus Functional Horsemanship

I received the following question through the comment block on the post about Jubal – the Mustang Nobody Wanted. Anonymous said, “Good site, thanks for all the information. What is the difference between what I have seen with Natural Horsemanship and what you are calling Functional Horsemanship? Is it something physical or a philosophy? Thanks again.”

I can see how you may be confused, being that most people want to give things labels, and in some cases, end up confuses most of us. The term “Natural Horsemanship”, I believe, it a copy righted term that defines Pat Parelli’s approach to horse training. Craig Cameron, on the other hand, advertises “American Horsemanship”. I have seen a lot of Craig Cameron’s philosophy and enough of Pat Parelli to tell you they both advocate approaches that are consistent with Tom and Bill Dorrance, and Ray Hunt, all of whom are credited in some way to bringing a better, safer and more gentle method to training horses, rather than the old method of man handling or making horses conform....using pressure and release,...making the right thing easy and the wrong thing hard,.......so, I would not get too concerned about titles, all of the top trainers and instructors use methods that would, in total or mostly, be approved of by the Dorrance brothers and Ray Hunt.

I can’t speak for anyone else, but I know I didn’t invent anything when it comes to horses or training. I was taught by someone else, and by many people in fact. The reason I titled this site “Functional Horsemanship”, was because I am trying to help horses through their new owners or maybe even an old owner who just grew up not really understanding much about horses. I think if you have horses you need to be “functional” with them,…able to enjoy the relationship with them and in particular riding, but also know enough to give these horses a fair life,…..because these horses did not choose the owner,…the owners chose those horses.

I have taught riding and horsemanship to small military units, who had a need to have some rudimentary skills with horses because they have found themselves in places and situations where horses (and sometimes mules and camels) were the only viable means of transportation. One Army Special Forces team asked me to give them some instruction on horses because they had just came back from a tour in Afghanistan where they sat at a base camp for four months only doing foot patrols because trucks were non-existent and none of them knew enough about horses to use the horses that the indigenous troops used. So I said something like,..”So it appears to me that you want some functional horsemanship skills” and the name just stuck.

Again, I didn’t invent anything. Sometimes I have a client or someone else say to me “Wow, I didn’t know that!”, and I always reply “Hell, I didn’t know it either until someone taught me.”

Wednesday, October 20, 2010

Jubal - The Mustang Nobody Wanted

This is a first post in hopefully a series of posts chronicling not just some of the training but the relationship progress with a human for Jubal who is a Mustang that I bought about 17 months ago that had been saved from a sales barn where he was purchased for slaughter.

I got a call from a local lady who works with the local courts and law enforcement to confiscate animals from neglect, abandonment or brutality cases and who is a leading area advocate for responsible animal ownership.

She asked me to take a look at this young Mustang she had saved, actual bought from a horse slaughter buyer. She was looking to find someone who could handle this Mustang and give him a good home. I was not looking for another horse but I agreed to look him over so I could tell other people about him.

What I learned was this Mustang came off one of the five or six Mustang herds in Oklahoma around three years ago now, but ended up in a shipping pen in North Texas enroute to the Sales Barn in El Paso where horses are purchased for the slaughter plants in Mexico to support the European horse meat demand. She bought him and had him shipped to a farm in Southern New Mexico where he was corraled for a year without handling - because he was too wild.

He was then sent to a local ranch for training, but they had to rope him to get halter on him and gave him some ground training in the round pen, but now needed to get rid of him as they were doing this for free and did not see any potential use in him, only headaches.

WHen I looked at him, I found a horse who was fearful, but I thought he had it in him to learn. I ended up buying him and thinking that he was either coming four or five, I would start over with him treating him like a two year old, put some ground training and a few rides on him, then wait for next year where I would treat him like a 3 year old and start his real training. That's where we are at now.

When I first brought him home, he was so fearful that he tried to jump out of his pen when I corrected him about being pushy on feed. He has also tried to jump out of the round pen a couple times as well. Let's see, he was reared up a couple times trying to paw me with his hooves and bite me in the stomach once and the arm twice. I didn't take offense as he was doing what he thought he needed to do at the time.

Over the past year, with a few rides in the round pen on him and constant handling on the ground, he was developed some trust in me that will make him accept a rider and become a brave horse. What makes him unusual to the Mustangs you see on the Mustang Makeovers, is the treatment he had to have received while in the shipping pens in North Texas and a few weeks in the sales pens in West Texas. That is where he undoubtedly learned that he was not going to get a fair deal form humans. That is what I must correct.


Sunday, October 17, 2010

Question on Trail Tools

I received the following from Steve in Walla Walla which is in Washington State
"I read a article in Western Horseman magazine on backcounty tools. Good article and was wondering what you recommend carrying on the trail. Steve from Walla Walla."

Steve thanks for your question. I understand their are some pretty good horses up in your part of country, which was a long time ago part of the Nez Perce or Palouse Nation,...correct me if I am wrong. I am also thinking that there was a Territorial Prison in Walla Walla,...maybe I'm wrong.

Anyway, to answer your question. I also read the excellent article in Western Horseman written by Ryan T. Bell. I believe the gist of the article was indispensable tools for going into the backcountry implying trips of multiple days. Ryan Bell advocated carrying a fencing tool, a camp hachet, a folding knife, a multi-tool (Gerber or Leatherman type) and a outfitter's saw. Which are all good choices.

I think the environment where you going is going to determine to a great extent what you need. I have no use for a hachet or outfitters saw in the desert and even in the pinon scrub and pine trees in the mountains.

Your question kinda implied trail riding, which is different (to me) than heading into the back country. Each and every time I head out even for short distances, I have the following items with me:

Rain Slicker. Even though we only get about 8 inches of rain a year a rain slicker is more than just a rain poncho. I can sack my horse or other horses out on a rider untying and putting on a slicker. If I get a sudden hail storm, I can use it to protect my horse's head - did that a time or two. It can also become a expedient blanket as well.

I carry an old combo tool like a shoe puller with slotted ends on the handle in case I have to pull a shoe. I carry a mini fencing plier with me also in case I have to go through a fence then fix it, or to cut away wire if one of the horse's gets caught up in some wire we didn't see.

I carry a good set of Leupold 8x42 powder river binoculars.

There is always some antiseptic wound powder, wound bandage, vet wrap and the absorbent end of a women's tampon in a vaccum packed bag in case I have to treat cactus thorn punctures or cuts and abrasions out in the field - also done that a time or two.

I carry a Hoof Wrap in case I get a sole puncture or have to take off a shoe. These Hoof Wraps are fold up ballistic type nylon and velcro hoof boots with a rubber type pad. You'll see a picture on one on the left side of this site. These come from the manufacturer with a size 2 or so pad which I trim to my biggest footed horse, which is a size 1, so it's a universal fit. These Hoof Wraps lay flat and are lightweight. Great trail kit.

I also carry a small canvas bag with some long and short Chicago screws and leather string in case I have to make field repairs to my or someone else's tack.

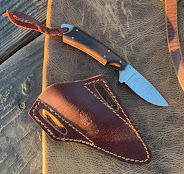
I am always carrying a fixed blade knife with a blade length of 3 to 4 inches. And almost always am packing a handgun and/or saddle rifle.

It is always a good idea to also carry a cell phone in case you get into trouble. And don't forget the water, even if you are going for just a few hours

Safe Journey Steve.

Monday, October 11, 2010

Craig Cameron - The Cowboy's Clinician


I have mentioned Craig Cameron, a Texas based trainer and clinician, a couple times before. However, he will be the last one to call himself a clinician. He simply calls himself a student of the horse,...a aspiring horseman. I recently had the opportunity to watch another of his clinics, for the 30th or so time, this time up at the 2010 Lincoln County Cowboy Symposium in Ruidoso, New Mexico.

Craig say's his first job is to take the fear out of the horse and he demonstrates by starting colts, which he has never seen before he gets in the round pen with them. In the interests of time and demonstrating in front of a crowd, Craig hurries things up a bit and ends up puts the first ride on these colts within the hour.

Think about it,...taking a fearful young horse in front of a large noisy crowd and within the hour gentling this horse enough so the horse will accept a rider and behave himself (for the most part) for a first ride.

Below: Craig answering questions from the crowd as the Paint Mare he just finished with looks on.


Craig with a troubled Palomino Mare who he nonetheless got to willingly accept him in the saddle within the hour.


It is certainly worth a long trip and expense to either go to one of Craig's clinics or to see one of his demonstrations.

Craig is the author of one of the best selling, if not the best selling Horsemanship book, titled "Ride Smart". This book is a must have reference book for all horseman, experienced or not. The best way to get one of his books is at a riding clinic of his; second best way is to buy one after watching one his demonstrations; the last way to get a copy is to buy from his web site, www.craigcameron.com or through the link at the bottom of this page.

Friday, October 8, 2010

Pre-Ride Check on New Horse


I received this e-mail from Judy in Phoenix, AZ: "I am in my mid 30's and will shortly be buying my first horse. Several people at the barn, I will stable my horse at, have offered to go with me. I am a fairly novice rider. Should I do a test ride first? And what should I do when trying out a horse? I know me and I think I'll just fall in love with the first horse that I know could be mine, but I know what a responsibility this will be and want to make a good choice., and not look like an idiot."

Judy, good questions! Like your attitude about horses. As you can probably tell from my videos, I never worry about looking like an idiot. Horses ain't the right business to get into if you have a big ego anyway.

Test riding a horse is mandatory. I suggest a few things when you get into the saddle. Does the horse move off when you mount? Does the horse willing give to lateral flexion when you ask for it in a direct rein? Does the horse back upon cue? Does the horse move his front end or back end over with leg pressure? This will give you an idea on how broke the horse is for riding and what to expect from him when you ride him off. You could ask the owner to ride the horse first,..in fact this would be a good idea, and ask the owner to demonstrate what the horse knows. Watch how the horse reacts to the rider.

Many times I'll ride with somebody and am asked to ride their horse to see what I think a problem may be. I always or nearly always go through a little pre-ride check before taking the horse forward. The below video shows you what I basically do.

A vet check on any prospective horse may be a good idea also as it may you some problems. Take along anybody who has more experience than you; listen to them; but make your own non-emotional decision would be my advice. I suggest you ask the owner why he/she is selling the horse as well. Good luck to you and safe journey.


Tuesday, October 5, 2010

Tying Knots - The Square Knot


I was reminded that I have not completed a post on the simple square knot. So I offer this post.

The square knot is a quick knot to secure two different sections or pieces of rope, or to tie a rope together as in a loop.

I used the square knot a lot, using leather stings to tie to bridles to bits or to hackamores. I'll also use this knot to secure ropes or other items to my saddles using the saddle strings. I have also used this knot to rig a chest loop to hook to another rope to make a descent down a small cliff or gulley to retrieve lost equipment,....such as hats that got blowed off, and I imagine it would come in handy to quickly get down to an injured horse or rider as well.


The square knot, see the photo above, is just a loop with the end of the rope coming back onto itself. To make this knot secure, you can add a half hitch on each end and dress up the knot.


Monday, October 4, 2010

Equine Chiropractic Technique Seminar


I often post Horse related events that may of interest to people. Although I am not necessary a believer in equine chiropractic care,...I am not a disbeliever either. I have used human Chiropractors in the past, probably need one now as well, and know they can bring a great deal of relief to humans,....so I think equine chiropractic care has potential to help horses.

Equine Chiropractic Technique Seminar

Where: Montara, California--November 20th and 21st, 2010. 20 miles south of San Francisco.

What: Hands-On horse chiropractic technique seminar.

Only 15 Registrants Accepted.

Conducted by Dr. Daniel Kamen, D.C. author of The Well Adjusted Horse. Last seminar in California . Dr. Kamen is retiring.

Learn how to adjust horses step by step. All moves are done by hand--no mallets and no instruments. Full Spine, Extremities. Learn how to restore normal joint function wherever possible. Even small people can adjust horses. Speed, not brute force. Learn the "Pre-Race Adjusting Sequecne" can cut a full second off the time.

This is a teaching clinic. Only registrants can bring their horses. No outside clients accepted. However, registrants do not need to bring their horse. They will be provided at the barn.

The cost per registrant is $450.00. Price includes the 16 hours of step by step hands-on training, adjusting DVD's, Workbooks, Lunch.

For details call Dr. Kamen at 1-800-742-8433 or email dkamen@hotmail.com subject line "Montara Seminar Details."

Supervised by licensed veterinarian.

This seminar does not legally entitle anyone to work on horses other than their own. Most states only allow a licensed veterinarian to do this.

Friday, October 1, 2010

Horse Health Care - Floating Teeth and Cleaning Sheaths

One of the most overlooked aspects to a Horse’s Health is care of his teeth. A Horse’s teeth will grow or erupt continuously until late in their life,..maybe 27-30 years old. The horse uses his front teeth (incisors) to bite off or grab grass or hay then pull back to their rear teeth (molars) in order to grind up the feed for swallowing.


Because of conformity issues with the horse’s teeth and jaw as well as due to basic diets of less fiber and natural grasses the horse will often not be able to wear down or polish his teeth very well. This creates an un-even bite, or “hooks” and “points” on his back molars and can lead to the horse not being able to chew his feed very effectively, which of course impacts on increased chance of colic. If the “points” and “hooks” are severe enough, they can wear sores on the inside of the horse’s mouth which can cause eating problems and even behavior problems, especially when wearing a halter or bridle. If you have ever broken a tooth and had the sharp end digging into your cheek you know what I mean when I say this can be very painful.

Care for a horse’s teeth, in a field known as equine dentistry, is through a Vet check of the horse’s mouth and teeth “floating” where the Vet rasps or grinds a horse’s teeth back into a smooth and usable condition. Floating teeth can be done “manually” using a rasp or file or the Vet can use an specialized electric drill with a special ceramic type grinding end and this is called “power floating”.

There is a misunderstanding about power floating that it can be very invasive and can tear up the teeth in short order. I have had horse dentist manually and power float teeth. Both are effective, however I would have to say that power floating is not only safer, but more comfortable to the horse and much quicker.

How often do you need to get your horse’s teeth floated? Depends on many factors such as genetics, previous injuries, type of feed they are on,….but to give you an idea, I have my Vet float my horse’s teeth every 14-18 months. The Vet sedates the horse with a combination of Rompum (sp?) and Torbugesic then uses a speculum on a bridle to keep the horse’s mouth open to do the floating.

Signs that your horse needs to have his teeth checked and possibly floated include: eating very slowly; needing more feed than usual to keep weight on; evidence of dropping bolts of partially chewed feed; behavior problems with a bridle, halter or bit; excessive salivating; not liking it when you rub him on the jaw; larger pieces of non-digested feed in his manure. The video below depicts a power floating of the back molars (Floating Part I).


The vet will also correct any problems with the uneven wear on the front teeth (incisors) as well as remove any excessive plaque build up on those teeth. See below video (Floating Part II).


Another overlooked part of Horse Health care for geldings and Stallions is the cleaning of the sheath and penis. A waxy buildup, called a bean, can get lodged near the horse’s urethra and make extension for urination painful as well as the waxy buildup on the inside of the sheath causing pain upon extension. We clean our geldings’ sheaths often and as thoroughly as we can without sedating the horse. But you can imagine how thoroughly you can clean the sheath when the horse is sedated. The third video shows the horse’s sheath being cleaned using water and a anti-septic solution.


Tuesday, September 28, 2010

Reader Question on Guns and History

I received this reader question. "Why all the articles on guns and history? I see Horsemanship in the title but see many articles on things other than relating to riding a horse. I stayed with your site for awhile but am now considering not coming back to read at all because of all the essentially non horseback riding or training information. What gives? P.S. Not trying to offend."

I learned along time ago not to wear my feelings on my sleeves,....that's pretty important when you work with horses, so I don't take offense. Not that I won't get bowed up when I have an inclination to.

I like history, particularly the Old West where living was dependent upon enduring hardships, learning quickly and often relying on horses and a person's ability to build a relationship with one.

My Grandfather (1878-1880) and my Uncle (1914-1918) were in the Calvary and I was one of the last Army Rider Riders who lineage came from the old Army Scouts who were soldiers, ex-soldiers, civilians and Indians. So I'm gonna write about subjects like that from time to time.

As far as guns go, they are another tool, like a pair of fencing pliers (ever used a pair?) or even a lariat. Many places you can still ride while carrying a gun, and particularly carrying a rifle is damn good idea. A Cowboy from Montana, 45ColtLC, and I have been discussing appropriate calibers for riding in Grizzly country for several weeks now.

My original idea, and still main focus, for this site was to provide information and help to the many backyard or small acreage horse owners who otherwise can't access training or attend clinics....and then it sorta branched off into the subjects you asked me about,...kinda natural I think, but if you don't think so then you may one of those who just needs to trailer to a clinic from a professional. Many can't do so, and those are the people (and horses) I'm trying to help as well as also write some things of interest to me in particular. I'm sorry I can't be more than that. Safe Journey to you.

Friday, September 24, 2010

One Tough Mule


I received this from a friend of mine,...

A couple from Montana were out riding on the range, he with his rifle and she (fortunately) with her camera. Their dogs always followed them, and on this occasion a Mountain Lion decided he wanted to stalk the dogs (you'll see the dogs in the background watching). Very, very bad decision.

As the Mountain Lion got closer and was noticed by the couple, the man got off the mule with his rifle and decided to shoot in the air to scare away the lion, but before he could get off a shot, the lion decided he wanted a piece of those dogs and charged. With that, the mule took off and decided he wanted a piece of that lion. That's when all hell broke loose .... for the lion.

As the lion approached the dogs, the mule snatched him up by the tail and started whirling him around, banging its head on the ground with every pass. Then he dropped it, stomped on it and held it to the ground by the throat. The mule then got down on his knees and bit the thing all over a couple of dozen times to make sure it was dead, then whipped it into the air again, walked back over to the couple (who were in stunned silence) and stood there ready to continue the ride ... as if nothing had just happened.

Fortunately even though the hunter didn't get off a shot, his wife got off these four ...


Wednesday, September 22, 2010

Reader Question on Parts of the Horse's Leg


An friend of mine asked me to do a post on getting familiar with a horse's leg anatomy so he could talk to the Vet on the phone about problems with his horse. This is a good topic as I'm sure a lot of Vet's have problems understanding questions and symptoms as related to the location on a horse's leg that are given over the phone from their clients.

Obviously the better the information a horse owner can his the Vet, the better and more accurate advice the Vet can provide in return. Even then expect the Vet to play 50 questions with you as you try to articulate the problem and what you are seeing.


It pays to be able to correct identify the parts of the horse's leg to get the Vet anatomically oriented to where the problem area is. If you don't know or have a hard time remembering the parts of a horse's leg, you can print the following picture, or better yet, buy any one of many good books on horse owner care and keep it handy.


Monday, September 20, 2010

Horse Health Care - Blister Beetle Threat


I received the following question a few days ago: “My friend was telling me that she read an article in a Horse Newspaper about beetles being poisonous to horses and that sometimes these beetles get into the hay where if the horses eat them, they will die. My friend couldn’t find the newspaper, so can you write about this?”

What your friend was referring to was a type of beetle called Blister Beetles. They are hard to identify as there are over 7,500 species. They are not so common in the Northern parts of the United States. There is an old wife’s tale about only spotted beetles can be blister beetles and this is not true. They can be red with black spots, or plain black or really any color. Do not rely on markings or color to identify Blister Beetles. They are pretty damn odd looking bugs, with a separate head, shoulders and body – although I doubt the technical body terms are correct. They do have three pairs of legs (6 legs total). Look at the pictures below and you’ll see what I mean.


I have only seen Beetles present in alfalfa maybe three times in the past 12-15 years. I threw out that bale, and was careful to pull apart and go through the other bales from that load, which came from the Dallas , Texas area. It did not keep me from contracting hay loads from the same transport or farm, but I always check my alfalfa, flake by flake when I feed, not only for Beetles but for mold and foreign contaminants. Heck, I have found turtles, rabbits, old shoes, paper bags, string, newspapers, beer and soda cans and a lot of other objects as well. So it just pays to check your hay.


What is dangerous to horses is that these Blister Beetles secrete a blister agent type of chemical called Cantharidin. Alive or dead these beetles can poison a horse with this chemical. It will blister the gut and cause pain and colic type symptoms, and there may be ulcer type sores in the mouth as the horses chew their hay, crush the beetles and release the toxin.

I am told the Blister Beetles feed off of the alfalfa flowers, which appear usually after the first cut. It only takes a horse to eat three or four of these beetles to kill it. So you can see that a very small amount of Cantharidin to be toxic and lethal.

I looked up the other symptoms and they may include frequent urination and dehydration. Treatment includes treating for colic; Some treatments include treating for colic; use of mineral oil to help move the poison through the gut more quickly and maybe to absorb some of the toxin and coat the lining of the gut; some people advise Charcoal may also be used to help absorb some of the toxin.

Consumption of Blister Beetles is life threatening for a horse you must take quick and effective action to save the horse, but it starts with checking your alfalfa and knowing what to look for. Safe Journey.

Friday, September 17, 2010

Army Scouts - Forsyth's Scouts and the Battle of Beecher's Island


A little known fight between 48 Army Scouts and 3 Army Officers, one of which was a Army Surgeon, against a mixed group of between 400 and 700 Cheyenne and Arapaho, and perhaps Sioux warriors, occurred 142 years ago today. This fight, called the defense of Beecher’s Island, took place near present day Wray (Yuma County), Colorado from 17 to 25 September 1868, near the "Dry Fork of the Republican River", sometimes called the "Delaware Creek" and also called the "Arikaree River".


Due to Indians attacks on the Railroad and wagon trains, General Phillip Sheridan, on August 24th, 1868, gave the order for the Army to organize 50 frontiersmen, to be used as Scouts against the hostile Indians. These Scouts were organized and placed under Brevet Colonel George A. Forsyth, with Lieutenant Beecher, Third Infantry, as his subordinate.

The Scouts were paid $50.00 per month with most of the scouts receiving an additional $25.00 per month for furnishing their own horse and saddle. Scout's carried the following individual equipment: Spencer repeating rifle or carbine with 140 rounds of rifle ammunition, Colt's Single Action Army revolver with 30 rounds of revolver ammunition, Blanket, Saddle and Bridle, Lariat, picket-pin, Canteen, Haversack, Seven days' cooked rations, Butcher knife, Tin plate and cup. Furthermore, the Scouting expedition was equipped with four pack mules carrying camp kettles, Picks and shovels (to dig for water), 4,000 rounds of rifle and revolver ammunition, Medical supplies, and, Extra rations of salt and coffee.


A total of 57 Scouts were hired, called Forsyth’s Scouts, from Fort Harker and Fort Hays, Kansas. A total of these 48 Army Scouts were present for the scouting expedition which culminated with the Beecher ’s Island fight.

Forsyth’s element, while on patrol attempting to locate Indians, encountered a large Indian force which forced them to occupy a defensive position on what came to be known as Beecher’s Island. Additional Indian forces converged to help in the attack. All of the Scouts animals were either killed or run off.

During the 8 or 9 day fight, a total of five Scouts were killed, another later dying of wounds received. Colonel Forsyth was wounded very badly. Lieutenant Beecher and Army Surgeon (Doctor) Moores were both killed as well. It is estimated that the combined Indian force suffered at least 70 dead and over 100 wounded. The successful defense was attributed to the rifle marksmanship skills of the Army Scouts.

A couple of Scouts snuck past the Indian’s surrounding the island and were successful in making their way to Fort Wallace for help, where a relief column that comprised of Company H of the famed 10th US Cavalry - Buffalo Soldiers - under Lt. Col. Carpenter arrive to relieve Col. Forsyth, led by eight other Forsyth Scouts who were previously detailed to another Scouting mission, plus nine Scouts of the 10th Cavalry.


Forsyth Scouts were formally disbanded on December 31, 1868.


Thursday, September 16, 2010

Transitioning a Horse from Dry Feed to Pasture


Received the following comment on a post concerning Horse Nutrition – Determining the Horses Energy Need,....Anonymous asked: "I'm moving my horse from Arizona to Tennessee. Do you have any suggestions on what I should be planning for?"

I assume you are asking about getting your horse ready for a transition from dry, baled hay to pasture grass. If so, you have the right idea, planning a transition from dry hay to pasture. Horses just cannot go from eating dry, baled hay one day to lush pasture grass the next safely without a transition.


This transition from dry hay to pasture needs to be a gradual change otherwise the change maybe so drastic as their delicate gut is stressed and colic can result.

We recently shipped a horse to Hawaii and in preparation for the 2 day trailer ride to California, then the 8 day trip via a ship to Hawaii, we found out what the horse will be fed enroute and started 4 weeks out gradually replacing increasingly larger amount of the horse's feed with alfalfa-hay pellets getting her used to the change in very small increments.

You may not be able to feed your horse lush pasture grass before you ship him off or trailer him up to Tennessee, so you'll probably have to do the feed transition once you are in Tennessee. Simply only let him eat very small amounts, then increase the time he is turned out to pasture, to give him the best chance of transitioning from dry feed to lush grass. Watch his manure when he is stalled so you can see any changes that occur as well as the amount of manure.

Depending upon the type of grass in the pasture, you may want to, or may have to supplement with natural grains, processed grains or dry alfalfa so the horse's nutritional needs are met.

I suggest talking to your horse vet about this as well as anybody you know in Tennessee who also brought their horse from a similar environment. Hope this helps and safe journey for you and your horse.

Tuesday, September 14, 2010

More on Using Hoof Testers


I received a request from Carol who asked for some more tips on using Hoof Testers. I hope that between this video and the previous video on checking for lameness where I also used the Hoof Testers will help understanding this tool and how to check for hoof soreness and possible problems.

I had an old horse who broke a coffin bone wing in his right rear hoof. When we were trying to figure out what was wrong with him, I used the hood testers on that foot and he about blew with the pain. After X-rays, the Vet had no hopes for him ever being sound again. That horse had paid his dues with me and I was not ready to give up on him, so I worked with my farrier to bring him back to soundness.

Another more likely possible with hoof soreness or lameness originating at the hoof is a foreign object such as a nail, cactus or mesquite needle penetrating the hoof and the hoof closing up over the entry. This will cause an abscess which is very painful and the horse will show on the area that gives him pain when pressure is applied with the hoof tester.

Hope this helps Carol,


Saturday, September 11, 2010

Buffalo Soldiers


In 1866, through an act of Congress, legislation was adopted to create six all African American Army units. The units were identified as the 9th and 10th cavalry and the 38th, 39th, 40th, and 41st infantry regiments. The four infantry regiments were later reorganized to form the 24th and 25th infantry regiments.

These fighting men represented the first Black professional soldiers in a peacetime army. The recruits came from varied backgrounds including former slaves and veterans from service in the Civil War. During the late 1800s and early 1900s, coming to be known as Buffalo Soldiers, these Black-Americans were assigned to the harshest and most desolate posts in the West and Southwest.

The nickname "Buffalo Soldiers" began with the Cheyenne warriors in 1867. The actual Cheyenne translation was Wild Buffalo. The nickname was given out of respect and the fierce fighting ability of the 10th Cavalry. Overtime, Buffalo Soldiers became a generic term for all African American soldiers. Some attribute the name “Buffalo Soldiers” to the Indians likening the short curly hair of the black troopers to that of the buffalo. Another possibility for the nickname was the heavy buffalo robes the soldiers wore on winter campaigns.

During the 1870-1880’s, the Buffalo Soldier wore a flannel shirt, and a blouse of dark blue with light blue trousers tucked into over-the-knee boots. Also, civil war kepi (hat) adorned with crossed sabers bearing regimental and troop designation. He was armed with a 45-70 Springfield carbine (rifle), a Colt Army .45 (1873 model) caliber pistol and a saber. He was outfitted with a slouch ‘campaign’ hat, black at first and a light grayish-brown by 1874, with a four way crease that became known as the Montana crease. The Buffalo Soldiers were not issued a neckerchief but generally wore one of his own color of choice anyway. Sometimes yellow was worn more often red or white. These were real necessities, especially for the men riding further back in the column needing protection from the thick clouds of dust kicked up by the front ranks.

1866-1891, The Indian Wars
- The 5,000 blacks who served in the all-black 9th and 10th Cavalry and 24th and 25th Infantry Regiments constituted about 10% of the total troops who guarded the Western Frontier for a quarter century. The 10th Cavalry Regiment is one of the unique regiments in U.S. Military history. Moving west from Fort Leavenworth, Kansas within a year after its activation in 1866, the 10th began its march into immortality becoming the original Buffalo Soldiers.

Locations like the Great Plains and in the mountains and deserts of New Mexico and Arizona were a formidable challenge. Ten years of near constant campaigning were required before conflicts with numerous Indian nations subsided. Buffalo Soldiers were also assigned to the Texas border in harsh and desolate posts, where they also subdued Mexican revolutionaries and Outlaws. Buffalo Soldier on Horseback from the 9th Cavalry below.


1898, The Spanish-American War
- The four regular regiments fought in Cuba , making up about 12% of the forces on the Island. The 10th Cavalry regiment distinguished itself in Cuba at Santiago and Las Guasimas, and in the famous charge up San Juan Hill . What most people do not know is that the brunt of the fighting was borne by the soldiers of the 9th and 10th Cavalry Regiments. One eyewitness has written: "If it had not been for the Negro Cavalry, the Rough Riders (and future President Teddy Roosevelt) would have been exterminated." The 10th Cavalry fought for 48 hours under fire from Spaniards who were in brick forts on the hill. Photo below depicts Buffalo Soldiers in Cuba.


An interesting fact is that then First Lieutenant John Pershing fought with the 10th Cavalry (Buffalo Soldiers) on Kettle and San Juan Hills in Cuba and was cited for gallantry, later known as “Black Jack” Pershing, given his nickname because of his service with Buffalo Soldiers, and becoming a famous General while leading a Expeditionary Force against the Mexican Rebel Pancho Villa, as well as leading troops during World War I.

1899-1902, The Philippines War
- In addition to the four Black regular regiments, two volunteer regiments composed of Blacks help wage this colonial campaign.

1916, The Mexican Punitive Expedition - The all-black 10th Cavalry comprised 12% of the forces sent in pursuit of Pancho Villa. The regiment suffered over half (10 men killed) of the casualties sustained against the Villistas.

Note: This post is focused on the African –American service members during the Indian Wars until The Mexican Punitive Expedition against Pancho Villa. It is not intended to convey that the only African American military service worthy of mention was the aforementioned time periods. Black service members contributed as fighting men as early as the American Revolution and continued to this day fighting against Islamic fundamentalist and terrorists in the Middle East and Southwest Asia. I am lucky and proud to have served with, and under, some of these modern day “Buffalo Soldiers.”

Thursday, September 9, 2010

Reader Question on Rifle Scabbards

I received a reader question asking where they could get a good leather rifle scabbard. The reader did not mention what type of rifle they wanted to carry, so I'll talk about several different options here.

I have several different leather rifle scabbards,..probably the two I use the most are one made by Classic Old West Styles (COWS) at http://www.cows.com, and one made by a prison leather shop that a Texas Ranger Captain gave me, which would be unavailable for most people. The COWS scabbard is a good high quality scabbard and anyone would be pleased owning it.

Depending upon your price range, Outfitters Supply, http://www.outfitterssupply.com has excellent quality leather products. The price would run from $125 for a carbine scabbard to $170 - $260 for a scabbard that would fit a scoped rifle.

I do not suggest buying the cheap leather scabbards, that I have seen priced at around $40. Generally, these cheap scabbards are made from poor quality leather and the stitching leaves alot to be desired. You don't need to be horseback and find your prized lever action missing from it's a scabbard. So I would stay away from the cheaper scabbards from places like Cabela's.

Two other excellent sources would be El Paso Saddlery at http://www.epsaddlery.com/
and Big Bend Saddlery at http://www.bigbendsaddlery.com/home.html


Examples of regular saddle carbine scabbard and scabbard for scoped rifle below:


Tuesday, September 7, 2010

Tying Mecate Reins to Slobber Straps


Responding to a reader question on You Tube about how to tie Mecate Reins to Slobber Straps,.... Proudtobeafarmgirl made a comment on the Lariat is More for Just Roping post,....."great video, no static and not much wind. Thank you for showing how to make a halter from the lariat, handy thing to know. Can you or do you have a video on how to tie the macate reins on to a snaffle with slobber straps?" OK Proudtobeafarmgirl, I offer this post.

Mecate Reins are one piece reins traditionally made out of hair so that it is prickly to the horse neck which adds in cueing a horse for neck reining. Nowdays yacht or rappelling rope mecate's are as common as hair mecates.

Mecates, sometimes called McCarthy reins which is the bastardized english version of the Spanish term, are normally tied to bits using leather connector pieces, called slobber straps, that are designed to keep the expensive hair mecate's away from the horses mouth not only to protect against the horses chewing on them or his slobber from getting on the reins, as the name implies, but to keep the prickly hair mecate from bothering the horse's sensitive mouth and lips.

In the video, I explain how I have my mecates tied, using knots on both outsides of the slobber straps as I think this balances the bit better, but I have included a picture below to show the traditional method of tying the near side or left side mecate to the slobber strap.

Generally you would create an 8 foot one piece rein with the mecate and have about a 12-14 foot length for a "get down" rope to lead from the ground with. This piece is traditionally "S" rolled and tucked into the belt from the bottom up so it will pull out easily if the rider gets tossed. It can also be coiled and tied to a saddle string.


The photo below shows the traditional method of looping the mecate through the near side slobber strap and brining the mecate back through underneath itself to lock it down. Either way, the method showed in the video or the picture below will work just fine.