Thursday, December 30, 2010

Reader Question - Wrapping Tendons


I had a reader write me abut sweating her horse's legs. Apparently her horse was lame and someone told her to sweat the lamed up leg.

I don't have much to go on here, but probably what your friend was alluding to was treatment and wrapping for the tendons, probably the flexor tendons in the back of a horse's leg which are often injured due to their function and extended use. This probably occurs often on the front legs due to much of the horse's weight is carried on the front end and the over reaching motion, such as in thick sand, often contributes to tendon injuries.

Now before I go further, I highly suggest you seek competent Veternarian authority or research more on your own to understand the horse's leg anatomy and the different types and severities of tendons or other leg injuries.

If you run your thumb and fore finger over the flexor tendons in back of the horse's legs they should feel smooth. Sometimes with small inuries there will be alittle swelling or some bumps evident as the tendon sheath tears alittle...could be scar tisue from old injuries too.

A more substantial injury is the "bowed" tendon, where there will be a visible bump or bow in the tendon. If this is not treated competently with anti-inflammation therapy and rest, this can become chronic....your horse won't be the same.

What I do when I suspect a tendon injury, and again if I think it requires a Vet, I will not hestitate to get my excellent Vet out to my small ranch. That's partially why I'm a poor man. Anyway, Hydro (water) therapy, hosing down the legs to reduce swelling and pain is a good first step. And sometimes I do it for a couple days.

Sweating the tendon, which was your question, involves wrapping saran or plastic wrap around the leg to keep the heat in promoting blood flow. Usually after some type of medication is applied.

I use a mixture of NitroFlurazone and DMSO, and using a rubber glove, I apply it to the horse's tendon, rubbing in it as much as the horse will stand. In the past I have use a steroid mixed into the Nitro and DMSO.

Caution on DMSO. Whatever is mix with the DMSO or what is on the surface of the skin will be taken straight through by the DMSO, so the leg must be clean, and again use rubber gloves. There is alot of debate on DMSO. I use it sparingly and I know some people who would rather be trampled by a stampede of draft horses then use DMSO.

Follow the application of medication by wrapping saran wrap around the leg, then a thicker cotton bandage, before I finish the wrap with Vet wrap. It is generally necessary to use medical tape on the vet wrap to secure it really well. The thicker cotton bandgae pads the injury and keeps you from wrapping it too tight with the Vet wrap.


I'll keep this wrap on for 24 hours, take it off and do hydro therapy and keep the wrap off for a day, then do it all over again until I see improvement. The longest I have had to do this was for about six days at which time the horse's lameness appeared to be gone however I gave him an additional week to 10 days of rest before I tested his soundness in a round pen before riding.


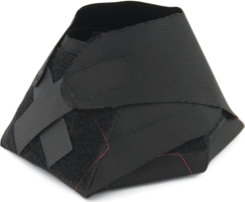
Prevention is key. Running your horses up hills and through thick sand can increase thir chances of injury significantly. Think about using splint boots on the front end to provide support. I need to do a much better job myself using these aids.

Tuesday, December 28, 2010

Custer's Last Guidon


An Associated Press article from December 11, 2010.

BILLINGS, Mont. – After spending much of the last century in storage, the only U.S. flag not captured or lost during Custer's Last Stand at the Battle of Little Bighorn sold at auction Friday for $2.2 million.

Frayed, torn, and with possible bloodstains, the flag from one of America's hallmark military engagements had been valued before its sale at up to $5 million.

The 7th U.S. Cavalry flag — known as a "guidon" and with a distinctive swallow-tailed shape — had been the property of the Detroit Institute of Arts. The museum paid just $54 for it in 1895. "We'll be using the (auction) proceeds to strengthen our collection of Native American art, which has a rather nice irony to it I think," said the museum's director, Graham Beal.

On June 25, 1876, Lt. Col. George Armstrong Custer and more than 200 troopers and scouts from the Crow Tribe were killed by up to 1,800 Lakota Sioux and Northern Cheyenne warriors near the Little Bighorn River.

Of the five guidons carried by Custer's battalion only one was immediately recovered, from beneath the body of a fallen trooper. According to testimonials from Indians involved in the fight, the trooper, Cpl. John Foley, was attempting to escape on horseback — and had almost succeeded — when he shot himself in the head.

All the other flags under Custer's command were believed captured by the victorious Indians. The recovered flag later became known as the Culbertson Guidon, after the member of the burial party who recovered it, Sgt. Ferdinand Culbertson. Made of silk, it measures 33 inches by 27
inches, and features 34 gold stars.

While Custer's reputation has risen and fallen over the years — once considered a hero, he's regarded by some contemporary scholars as an inept leader and savage American Indian killer — the guidon has emerged as the stuff of legend.

"It's more than just a museum object or textile. It's a piece of Americana," said John Doerner, Chief Historian at the Little Bighorn Battlefield National Monument in southeastern Montana. For most of the last century the flag was hidden from public view, kept in storage first at the museum and later, after a period on display in Montana, in a National Park Service facility in Harpers Ferry, W.V., according to Beal, the museum director.

A second 7th Cavalry guidon was recovered in September 1876, at the Battle of Slim Buttes near present-day Reva, S.D. Now in possession of the Little Bighorn Battlefield National Monument, that flag was poorly cared for and is now in horrible condition — "almost dust," according to the monument's chief of interpretation, Ken Woody.

Saturday, December 25, 2010

Reader Question on Pulling Shoes in the Backcountry


I received an e-mail from Meghan who asked what would be a good tool to carry in the backcountry, where weight and space is at a premium, that she could use to pull a shoe if she needed to.

With a good knife to use as a clinch cutter, to bend the horseshoe nails straighter, and a fencing tool, I think you could do a decent job albeit not as easy as using a farrier's pull offs.

I carry a Plammer, which is a fencing tool with a hammer head. This comes in handy if I have to cut then repair a fence and pound fencing staples (U shaped nails). I have a smaller version that is 8 inches long and fits in my saddle bags. The jaws open wide enough so I can grab a horseshoe and twist off once I get the nails un-clinched. The idea is to minimize hoof wall damage by straightening the nails first.

I'll place the blade of the knife under the clinched nail then rap sharply with the plammer. Once I get all the nails un-clinched, I'll use the plammer fencing jaws to grab the horseshoe and twist off.

This will be tougher if your shoer gouge the hoof and clinched the nails tightly into the gouge, or if the shoes have been on for awhile and make the nail end hard to get to. My shoer uses toe or bar clips on the shoes which makes it harder to twist off, but the plus side is that I have had only two loose shoes with this shoer and neither were his fault.

By the way, I use Diamond Bar V Horseshoeing out of Silver City, New Mexico. Best shoer I've ever had.

I suggest the next time you have your horses shod, ask your shoer about taking off a loose shoe or even re-nailing when in the back country. I carry a few extra nails for this purpose - never used them - and would think the knurled head of the Plammer may make it difficult to drive a nail straight.

I have also used just my knife and a rock to un-clinch nails then wedge the knife underneath the shoe to lever it off. It was on a buddy of mine's horse and I did not like doing it this way, that's partly why I carry a Plammer now.

Other than that Meghan, the only other solution I can think about it cutting down a long handled pull offs or finding a smaller version. But the Plammer has more uses than just pull offs so I think you'll see the advantage. Safe Journey.


Friday, December 24, 2010

Reader question on a Horses Salt Needs


I received an e-mail from a lady in Pennsylvania asking about how important it is to provide your horse salt and what is the best way to do so.

Salt or sodium is an essential electrolyte that is minimally present in any of the normal feed we provide horses. The more a horse works and sweats, the more salt he will lose which if not replaced can cause an electrolyte imbalance.

Most horses will eat hay until they colic, but with salt most horses will only consume what they need. There are going to be odd horses, and I have seen one, where the horse will chew and chew on a salt block until it is disintegrated.

I always keep two or more salt blocks in the corral for the horses to lick on. I prefer a white salt block as opposed to the reddish mineral block which is rougher on the horses tongue and makes them less likely to consume any. Again, there is always the odd horse who would lick the mineral blocks. I place the 50 lb salt blocks in a rubber dish with drain holes for the water, so the block is kept off the ground (see picture above).

So I would definitely recommend adding a salt block so the horses can access free choice salt whenever he wants to. I previously wrote a post about this, you can read it here. Also, from time to time you'll need to scrap the dirt and debris off the block. And don't forget the fresh clean water!

Monday, December 20, 2010

Recipe - Range Rider Green Chile Stew


I recently had an old friend of mine ride with me into an area that I had found an old Spur of a design that makes us think it was made by August Buermann. The spur in the picture is an example of his work, not the rusted old spur that I found. Riding throughout the Southwest, moistly in Arizona and Texas, my friend was aware of the history and treasures you could find. Plus it was just a good time to catch.

When we got back to the property and had the horses brushed and turned out, my wife had a bucket of Green Chile Stew for us. My friend liked it so much he said we oughta let other people know the recipe,..here it is:

Range Rider Green Chile Stew

Ingredients
Two 12 oz cans of Chicken Broth, or 24 ounces of water and 3 Chicken Bullion Cubes
One 12 oz can of Rotel tomatoes
One 12 oz can of Green Chiles or an equivalent amount of fresh green chiles, chopped up
One small onion
Tablespoon of Garlic Powder
One to 1 ½ pounds of boneless Pork cubed small
Three cups of Red Potatoes, quartered
Seasoning such as Adobe or Cattlemans

Cooking
Bread the pork by dunking in egg then cornmeal; could use water and flour I suppose then brown in large deep skillet or Dutch Oven (browning with butter would be nice)

Then add all other ingredients into the pot, bring to boil then simmer for a couple hours until potatoes are tender. I like to use a Dutch Oven as you can pile coals over the top and cook more evenly. A Crock Pot will work and to tell you the truth, that’s what we use most of the time when we’ll at home.

Buttermilk Biscuits go well with this.

Safe Journey,…with a full stomach.

Thursday, December 16, 2010

Reader Question - Cold Weather Riding


I received a reader question, through the contact me form, asking just how cold is too cold to ride her horse and what gear I ride in when it's cold.

Well, first of all cold is revelative. If you literally grow up in the cold environments like the Northern border area of the United States, then not only are you going to be more used to that weather, but also familiar with the steps you take and the clothing you wear to keep yourself safe.

If my memory is correct, I have rode when temps are in the low teens, although I'm sure I did not do alot of galloping and loping. I think that if the horse can live in the cold, he can be ridden in the cold with some caution not to over work him or get him too sweaty.

In the fall and winter, I routinely ride for five to seven hours in mid 20 degree temps, again just being careful not to overwork the horse. No sense loping up hills or in thick sand or snow if you really don't need to.

I would be sure to cool down and dry off your horse and even put a blanket or a slick sheet on him if you are trailering him home. I keep an old towel in my trailer and blanket lined canvas blanket for this reason.

Some people will have their horseshoer tack on some boron spots on their shoes to give the horse better footing on snow and ice and well as keep the shoes from wearing so much.

Now, cold weather to me is temperatures in the mid 20's. I sustained frost bite when I was 14 years old up in Northern Idaho, so when the temps get into the 30's I can start feeling my hands, then feet tingling, then stinging. I always wear gloves, summer or winter. The gloves in the winter time, depending upon the temperature, are insulated. I like the Heritage leather gloves with 40 grams of thinsulate. I also use their un-lined and un-insulated leather and nylon version for work gloves as well as just some thin pig skin gloves.

You need to dress in layers and not get sweaty yourself. There are a wide variety of sweat wicking shirts, like from Under Armor and such, which help take moisture away form your body. To get wet in the winter time, especially with a wind, can mean a cold injury.

I like plain old cotten, so when the temperatures get in the 20's, I'll wear a long sleeve thermal cotton shirt, then a work shirt, then a vest all under a Carhartt or Schaefer work coat. Colder than than that I trade my work coat for a sheepskin line long coat, cut for riding which also gives from protection to my upper legs.

If you wear a hat, there ear muffs available at sporting goods stores that can cover and protect your ears from the freezing winds and frostbite.

You do not want to get frostbite as then you'll be more susceptible to the cold and another cold injury. I think with common sense and the right equipment you and your horse will be fine.

Sunday, December 12, 2010

Army Scout - Billy Dixon


William "Billy" Dixon (September 25, 1850 – March 9, 1913) scouted the Texas Panhandle for the Army, hunted buffalo for the train companies, defended the Adobe Walls settlement against Indian attack with his legendary buffalo rifle, and was one of eight civilians in the history of the U.S. to receive the Medal of Honor.

Dixon was born in Ohio County, West Virginia on September 25, 1850 and was an orphan at age 12. He lived in Missouri until 1864. He worked in various capacities along the Missouri River until he started working as an mule skinner for the government.

He was a skilled marksman and occasionally scouted for Eastern excursionists brought by the railroads. In 1869, he joined a venture in hunting and trapping on the Saline River northwest of Fort Hays in Kansas.

He scouted Texas as far south as the Salt Fork of the Red River when the buffalo hunters moved into the Texas Panhandle in 1874. He and his group hunted along the Canadian River and its tributaries.

Dixon led the founders of Adobe Walls to the Texas Plains, where he knew buffalo were in abundance. The group of 28 men and one woman occupied the outpost of five buildings 15 miles northeast of Stinnett.

The outpost was attacked on June 27, 1874 by a band of 700 Indians, and that is when Dixon went into the history books for firing "The Shot of the Century."

The stand-off continued into a third day, when a group of Indians were noticed about a mile east of Adobe Walls. It is said that Dixon took aim with his Big 50 Sharps rifle and fired, knocking an Indian off his horse almost a mile away. The Indians then left the settlement alone. Commemorative "Billy Dixon" model reproduction Sharps rifles that supposedly recreate the specifications of Dixon's famous gun are still available today.

Billy Dixon quit buffalo hunting and, the following August, became an army scout. In September 1874, just three months after Adobe Walls, an army dispatch detail consisting of Billy Dixon, another scout Amos Chapman, and four troopers from the 6th Cavalry Regiment (United States) were surrounded and besieged by a large combined band of Kiowas and Comanches, in the Battle of Buffalo Wallow. They holed up in a buffalo wallow located in Hemphill County and, with accurate rifle fire, held off the Indians for an entire day. An extremely cold rainstorm that night discouraged the Indians, and they broke off the fight; every man in the detail was wounded and one trooper killed. For this action Billy Dixon, along with the other survivors of 'The Buffalo Wallow Fight', were awarded the Congressional Medal of Honor (for Gallantry in Battle). A Texas Historical Marker documents the battle site.


In 1883, Dixon returned to civilian life and built a home near the Adobe Walls site. He was postmaster there for 20 years and also was the first sheriff of Hutchinson County, Texas. He also served as state land commissioner and a justice of the peace.

In 1894, he married Olive King Dixon of Virginia and fathered seven children. They eventually moved to Oklahoma around 1906.

Dixon died from pneumonia at his Cimarron County homestead in 1913 and was buried in Texline. In 1929, his body was reinterred at Adobe Walls near where he stood when he first saw the Indians riding up the valley.

Friday, December 10, 2010

Reader Question: Bad Manners Coming Off The Halter


A woman named Carol wrote to me about her horse having bad manners coming off the halter when she went to turn her horse loose, both in the stall and in turn out. Carol says that otherwise her horse is good to ride and a fairly well mannered horse.

Actually this is pretty common, you have to let your horse know you expect him to stand until you cue him to move away after the halter is taken off. The better the overall ground manners is with this horse, the better he will be standing for the halter to be removed. I’ll just bet that Carol’s horse will continue to walk off if she stops when leading it.

If you get in a routine of keeping a horse in the stall for a couple days, then taking the horse to a turn out, the horse is going to pretty antsy about it and will often anticipate the halter release and pull away before that is complete. When putting the horse back in the stall when feed is present is another common point where the horse will be quick to get out of the halter and get to the feed.

Every time I get a halter on a horse to lead him someplace or other (shoeing stand, wash rack, round pen, tie rail for grooming, etc.) I always make it a short training exercise by stopping the horse, backing him, have him move his fore end or hind end over,…..having him drop his head, and sometimes just stand until I’m ready to move off. I think you should do this each and every time you put a halter on a horse to reestablish those ground manners which will transfer to other things as well such as standing when the halter is removed….only takes a minute or so to do this.

I always use a rope halter. I prefer the Double Diamond brand. The rope halter can be used to get the horse attention just a little more because the rope will apply more pressure than the traditional webbing halters. So Carol, I suggest you use a rope halter.

I don’t have a horse with this problem, so I am demonstrating in the video with a horse I board. Biscuit is a black, grade mare who is not handled a great deal and gets away with some things because of it. The night before I shot this video I had put her back in her stall, with feed present and she pulled away as I getting the halter off. I put the halter back on and off until she understood to stand still until I had the halter completely removed and cued her to move off. So she remembered this lesson the next day when I shot the video below. So you won’t really see a horse having this problem corrected. You’ll see me lead the horse out of her stall, stopping, backing to reminder her of her manners, then placing her in the arena where I ask her to stand still while I get the halter off.

So Carol, I suggest you tighten up all the ground manners and don’t let your horse get away with the halter routine. Do it right until the horse gets the message. Good luck and safe journey.


Tuesday, December 7, 2010

Recipe - Hardtack Biscuits

Hardtack. Think of concrete biscuits. This was actually a staple back in the old west since it could be easily carried without degrading. Some soldiers, like the foot infantry, even carried hardtack biscuits in their pockets for days/weeks.

Made simply by mixing 6 parts flour and one part water; kneading into flat biscuits (about one half to three quarters inch thick) then baking for one half to one hour. Hardtack was, sometimes with Arbuckles Coffee, all Cavalry soldiers had to eat when on patrol. Sailors often subsisted on hard tack biscuits when at sea for long periods of time.

Making Hardtack biscuits even thinner, about 1/8 inch, would reduce cooking time and make them (supposedly) easier to eat. Be sure to poke holes into the biscuits so they cook more evenly. This will give them the “saltine” cracker look.

Hardtack is best eaten after soaking in water, gravy or soup stock. You can add a little corn or vegetable oil or even butter to make them easier to eat, but start off adding very small amounts such as a teaspoon or tablespoon. Butter can also be used, in small amounts. I have heard that adding a handful of steel cut oats to the mixture will also enhance their taste and ability to digest the darn things.

If you add Salt, either iodized Salt, Sea Salt or Light Salt (half salt, half potassium) be aware that your hardtack be more likely to attract moisture.

You can order a pound or Arbuckles Ariosa Coffee from Arbuckle Coffee Traders


Sunday, December 5, 2010

Reader Question - What Can I Do About Pee Spots in Stalls

I received an e-mail from a lady who asked me what she can she do to keep her horse from peeing in the same spot in his stall day after day. SHe doesn't like the smell and it turns the soil black.

Many horses kept in pens or stalls will pee in the same spot time and time again, saturating that ground with urine and creating that ammonia smell.

Most horses don't like the spray of the pee hitting them in the legs, so you can lay a mat down in that area. When they pee the spray will spatter on their legs and they will most like go someplace else to pee. You can keep moving the mat around the stall as they begin to "wear out" one spot or another. A light weight truck bed mat would work.


Another thing you can do it to place pylons (traffic cones) in that pee spot to serve the same purposes. Sometimes this just doesn't work. In fact, the picture is two large traffic cones I placed in my Mustang's pen just to illustrate, as I had previously tried this and would find the cones tossed around or even find them outside of the pen. He would pick on up in his teeth and fling it about. Great fun for him I reckon.

You can dig up the wet dirt from the pee spot and spread around to let it air/Sun dry, as well as rake in a little bit of lime to the soil to counteract the ammonia smell. I always keep a couple hundred pounds of lime on hand for this purpose and in case I have to bury an animal.

Wednesday, December 1, 2010

Mantracking - Stride Length and Using a Tracking Stick

I show how I use a tracking stick on the below short video. Sorry about the wind noise, but I think you'll be able to hear it.

I normally mark a print I find with a "U" around the outside of the heel so I can tell I've been on the track before, so tell someone who is following me that I'm on this track.

I sometimes use a tracking stick to measure normal stride length in order to find it again when I lose it, especially in hard ground. Once you are behind enough sign you'll get a feeling for the size of the foot gear that made the track; reading pressure release which combined with stride length and size footgear will give you an idea on speed, weight of the person and possible load he/she may be carrying; and in sometimes provide other clues such as if they are injured or tired, looking behind or up into the sky and other things as well.

A 1/2 inch 2 or 3 foot oak dowel makes a good tracking stick. You can use rubber bands tightly wrapped onto the stick or rubber grommets in order to have a movable point of reference for measuring tracks,...not just their stride length, but the width of the heel and the widest part (ball) of the print as well.

Eventually you'll get to where you do not use the tracking stick, but may perhaps use a piece of stick you find on the ground. I have even carried a 2 foot tape measure to precisely measure the print for future positive identification.

Tracking on Horseback sometimes provides a better perspective on the sign, unless the Sun is directly overhead. Sometimes you'll need to dismount and look more closely at the sign to determine what you think you are seeing.