Sunday, February 28, 2010

Horse Health Care – Equine First Aid Kit


I get a call from time to time to go to somebody’s place and help them with a horse injury or just to look at a horse that “just ain’t right”. Now I always tell people to call their Vet, but it seems like most of these calls are Friday night through Sunday night, when it is hard to get ahold of a Vet, or at best, you get an answering service. For the record my Vet is available 24/7 and 365 days a year unless she’s out of town – but not all the people I know use her. So, as well as having an organized Horse Medical - First Aid Kit for my own use on my own horses, it pays off for me to have a first aid kit I can throw into my truck without having to scrounge around loading up things I think I may need.

I use a “Big Mouth” canvas and nylon tool bag that I bought at Lowe’s and in it I have the following items:

Stethoscope
Digital Thermometer – the kind with a push button on feature and only takes about three second to get a reading.
Disposable rubber gloves
Duct Tape
Hoof Boot
(Easy Boot)
Wonder Dust Wound Powder
Blue Kote Wound Spray
Corona Anti Septic
– for wounds, but also good for coating a digital thermometer before you place it in the horse’s butt
Squirt Bottle of Alcohol. I also pack alcohol prep pads, but alcohol is cheap and squirting a lot on an injection site and cleaning with a gauze pad is probably a better way or ensuring you have a clean injection site
Gall Salve
Assortments of Syringes
, 12 cc to 30 cc and Needles, 18 and 20 gauge needles
Vet Wrap (lots of Vet wrap!)
Roll of Saran (Plastic) Wrap
Gauze Sponges and Gauze Pads
Kerlix Bandage
Cotton Roll
, 12 inch wide by 5 foot long roll of cotton
Medical Tape, Elastic type
Pelican Head Lamp as you invariably are looking at horses at night. I also have a ball cap with LED lights in the brim – that comes in handy too and I’m way too old to be concerned about looking geekish.
Bandage Scissors
Povidine-Iodine 10% Solution
Triple Antibiotic Ointment
Clear Eye Washing Solution
Opthalmolic Anti-Biotic Ointment
(for eye infections)
Ear Mite – Tick remedy (half Campho-Phenique and half Mineral Oil)

As you can see from the picture, I keep everything in zip lock bags to prevent dust and dirt from each item.
I also keep medicines in a fridge in the Tack Room, and I can grab it and throw it into my First Aid bag in a hurry:

Bute Paste
Pro-Biotics Paste
Fluxomine (Banamine) injectable solution
Penicillin Injectable Solution
Electrolyte Paste

In my saddle bags I always carry a small bottle of Wonder Dust Wound Powder and a roll of Vet Wrap with some guaze pads and the absorbent portion of a ladie’s tampon stuffed inside the Vet Wrap hollow roll. A lot of time a horse will get a horizontal laceration of a fore leg and those absorbent portions of a ladie’s tampon is a good fit for the wound.

Hope this helps you decide on what you need for your kit. I have to caution you that before your give medications, such as Banamine or anything else, consult your Vet.

Saturday, February 27, 2010

Horse Hoof Care – Recognizing Laminitis


Laminitis, also called Founder, can be a horse killer. Founder/Laminitis has come to commonly mean structural hoof problems involving a separation of the hoof sole from the hoof wall or a rotation of the bones in the hoof where the bones become closer to the bottom of the hoof. Imagine the soles of your boots separating from the rest of your shoe then your bare foot is touching the ground and you’ll get the idea. Very painful to the horse, founder will make a horse lame and may also be evident from fluid or pus appearing to exit from the coronet band or from the sole of the hoof where it connects to the hoof wall. Because the horse presents a lot of its weight on the front end (the front two legs) there is a lot of pressure exerted down into the coffin bone inside the hoof. See sketches below of normal and rotated coffin bone.


The most common cause of founder is over feeding high protein feed such as alfalfa or processed feed – this is usually called grain or hay founder. More reason to secure your stall gates and otherwise protect your hay from a horse getting into it. Most horses will eat and eat until the horse either colics or founder.

Other reasons for founder may be a hot horse drinking a large amount of water (water founder) or a horse jogging or loping on a hard surface with the result being severe concussion to the hooves – called road founder.

Founder can come on fast. A horse beginning to founder will be lame and often the hoof around the coronet band will feel hot. Not much you can, except for letting the horse stand intermittently in water to cool the hooves, this reduces inflammation but you should immediately call your Vet to look at your horse. The Vet may take X-Rays to determine if there is any rotation of the coffin bone. I have been called to look at many horses who symptom wise appear to be foundering, however a recently trimmed hoof that has had too much sole removed (called quicking the hoof), or a penetration into the sole by an object such as a thorn or nail can replicate initial founder symptoms.

Usually a horse that has founder will stand with their back feet up underneath themselves to reduce the weight on the front feet in which most founder occurs at least first. A horse with all four feet foundering will lie down for an extended period of time.

A horse who has chronic founder will often have rings around the hoof, called founder rings, which document that horse’s chronic founder.

Common treatment of founder usually includes your Vet and Farrier working on concert – X-rays, anti-inflammatory drugs and corrective shoeing, plus a special feed management with a low protein diet such as grass hay only.

Friday, February 26, 2010

New Functional Horsemanship site features


For those of you that have already found the new “contact me” feature and have sent me e-mail comments and questions – Thank you for your interest, and for those of you with questions, I want you to know that I have not forgotten about you. I will be addressing your questions soon.

I have,.....well, really not me, but my computer savvy advisor, installed a “Followers” feature as well as a “Subscribe to New Posts” feature, both of which are located in the bottom LEFT hand side of the site.

You can also find my videos on my Functional Horseman YouTube Channel.

Until next time, be safe.


American Competitive Trail Horse Association


The American Competitive Trail Horse Association (ACTHA) is a fairly new organization with the stated mission of “Providing an enjoyable venue showcasing the wonderful attributes of the great American Trail Horse, granting them the recognition they so richly deserve. To maintain a registry open to all breeds and a point designation system which will stay with each horse for its lifetime, thereby adding to their value and distinction. To enable the humane treatment of horses in need. ACTHA donates up to 50% of its proceeds to eligible horse charities annually.”

The ACTHA website advertises the following: “That the Organization’s Founders, Karen VanGetson and Carrie Scrima, were tired of long drives to multi-day, timed competitions. They wanted a venue where they could enjoy their horses and the wonderful scenery around them. Of course they wanted some challenge and a chance to learn as well as show off their horse’s talents. But most of all they wanted beauty, camaraderie and fun! Try as they might to find this in areas they were interested in or on a national level, their search was in vain. So Carrie said "Let’s start one!" Thus the foundation for ACTHA began.”

ACTHA is billed as casual competition and has been endorsed by well known Horse Trainers, Clinton Anderson and Monty Roberts.

A Competitive Trail Challenge is billed as a 6-10 mile ride, negotiating judged obstacles such as crossing streams, crossing bridges, riding up/down steep hills,
backing around obstacles, dragging a log, opening/closing gates, jumping over a low log, riding through vine styled obstacles, trotting over spaced logs, stand in position while a loud noise is present, walk on/around plastic tarp/bags and trotting/cantering from point A to point B.

Sounds like a good training venue to me. If you are interested in the American Competitive Trail Horse Association, please go to their website and poke around.

http://www.actha.us/


Thursday, February 25, 2010

When to Blanket Your Horse. Just how cold does it have to be?


Just asked this question the other day.......“When should I put a blanket on my horse?”

As with questions in general and horse questions in particular there is usually no easy answer. There are certainly a lot of opinions on this. My opinion is all horses should be broke or trained to accept a blanket. A blanket is a good tool to use when the horse is colicing or you are trying to minimize body heat loss after heavy exercise particularly in cold weather. But the intent of today’s question was due to the colder than normal temperature we were experiencing in West Texas.

I have an old roping horse, named Roy, that’s 27 years old. I have talked about him before in other posts. Anyway, he never grows much hair so I generally blanket him when the temperature is below 28 to 30 degrees. If it is early in the cold weather season and he hasn’t grown the minimal hair that he does grow, I may throw a blanket on him when it’s in the mid 30’s.

My other horses grow a substantial amount of hair. In fact my Mustang looks like Sasquatch. All my horse’s are broke to wear blankets but don’t generally do so until the temperature drops in the low 20’s.

Horses that grow up in cold climate are more accustomed to cold weather and may not need blankets until very, very low temperatures – for me this would be low teens to hell freezing over. Keep in mind that horses in the wild or turned out in large acreage can move around keeping blood moving whereas horses confined to stall, particular small stalls cannot.

Putting a lot of work on a horse then into a trailer for a long ride home when he is still hot and not dried off, especially in cold weather, may not be such a good idea. In really cold weather (for me that’s teens to high 20’s) I’ll unsaddle my horse and put a lined canvas blanket on him for the cold ride home.

Also keep in mind that wearing blankets early in the cold season can minimize hair growth. In fact, some show people keep sheets and blankets on their horses practically year round to keep that short hair look and make them easy to groom. Sometimes they keep them in perpetually lighted stalls to help reduce hair growth.

There are many different styles to choose from: Velcro belly bands versus belly straps with hooks; pull over the head versus buckles in the chest. Introduce the blanket to the horse for the first time like you would when saddling him for the first time. It’s the odd horse that can’t be conditioned to accept a blanket even the ‘pull over the head’ ones.

I gotta say that the pull over the head, velcro belly band blankets, even if I still use the old buckle type, are quick and easy to put on. If you are using a velcro belly band blanket for the first time, sack your horse out on the velcro sound. Someone recently related to me that the velcro noise really spooked one of their horse and almost made her run through a fence. In any case, you should be able to buy a good quaity horse blanket for under $50.

Blankets are purchased by size, measured in inches, from the middle of the horse’s chest, around the side to the middle of the butt. Horse.com publishes a "rules-of-thumb" guide for blanket fitting.

68" - For 1 to 2-Year Olds (13-1/2 to 14 hands tall)
72" - For 2-Year-Old-Horse (14-1/2 to 15 hands tall)
76" - For Average Horse (15-1/2 to 16 hands tall)
80" - For Large Horse (16-1/2 to 17 hands tall)

Monday, February 22, 2010

Horse Hoof Care – Hoof Supplements

What’s the deal on Horse Hoof Supplements? Talk to Horse Owners, Horseshoers and Veterinarians and you’ll get conflicting opinions on whether or not hoof supplements actually work.

I have been told that the lack of independent studies on Horse Supplements are due to Horse Supplement manufacturers being reluctant to fund studies on supplement effectiveness that are outside of their control. A worst case for these Supplement manufacturers would be funding a study that concludes these supplements do not work. But this reluctance does not mean supplements don’t work.

I have had two horses on Hoof Supplementation over a prolonged period.

Roy is a gelded Quarterhorse who had been ranch raised and used for arena roping. After a couple of seasons in the arena I was considering semi-retirement for him when he broke a coffin bone wing in his back right hoof. He was around 22 years old at the time. My Vet told me it would never heal and although the horse could eventually be somewhat pain free he would never again be a saddle horse. Over a 14 month period working with my horseshoer using egg bar shoes and contracting the foot slightly, and, use of Horseshoer’s Secret Hoof Supplement, Roy’s hoof was healed. X-Rays showed solid bone growth in the break and Roy is enjoying his semi-retirement. he is used as a lesson horse and for packing on short trips.

Junior is a Mexican Grade gelding, that is a horse from Mexico without known lineage. I picked him up at approximately four years old even though he appeared on have lapsed (slightly collapsed) heel bulbs on his back right hoof and very thin hoof walls. I placed him on Hoof Supplements even though there is nothing that can be down about thin hoof walls. I just wanted to give him the best chance of having the best feet possible. My shoer is always remarking about Junior’s consistent hoof growth and the hardness of his soles. What I know is that Junior is a sound horse over soft and hard ground. As an Army Range Rider, I never hestiated to take him into the remote back country. Despite his thin hoof walls he has only thrown a shoe once in the past 5 years and that was due to overstepping once when we came down a hill at a lope and stepped into some really soft sand, causing him to overstep and clip his front left shoe and pull it loose.

One of my buddies, who was finishing up his Doctorate in Ruminant Management a local University, who also has alot of experience in equine supplements as well, told me was that he was sure hoof supplementation worked to strengthen the hoof sole, although he had “no hard data” on tests. He did tell me that if I was going to put a horse on a hoof supplement to ensure that the product contained certain ingredients. Those were primarily Biotin, Methionine, Calcium, Protein, and Lysine.

We know that whatever the horse eats goes straight to his feet. If you just picked up a horse that did not get good, consistent feed, maybe evident from uneven hoof growth visible through rings around the outside hoof wall growing down from the coronet band, then you may want to consider putting that horse on Hoof Supplements. If you do, then you need to consider the fact that it takes around nine to twelve months to grow a totally new foot.

My bottom line is I think Horse Hoof Supplements can provide nutrition necessary for optimum hoof health. I don’t think they can fix conformation problems with bad feet.

Saturday, February 20, 2010

Horse Hoof Care - Protective Hoof Boots


One of the pieces of equipment that a Horse Owner should have on hand for Horse Hoof Care is a Protective Boot for the Hoof. The protective boot is sometimes referred to as an “Easy Boot” although this is really one brand type of protective hoof boot.

Typically the uses for these Protective Hoof boots are to protect a sensitive hoof, allow for a hoof injury to be treated and kept clean or for use when soaking the hoof with Epson salts, used to give the horse traction on shoe and ice, or, used on the trail when a horse pulls a shoe or is barefoot (un-shod) and is moving in really rocky terrain.

I divide these Protective Hoof Boots in two categories: One boot that you keep around the barn for use when treating injured or protecting sensitive hooves, and, a smaller, lighter and/or more compact boot that you carry on the trail in your saddlebags for use when a horse throws a shoe or otherwise needs the protection.

There are many different types and manufacturers of the first kind of Protective Hoof Boots. I am only going to show you one kind, which is the original EasyCare Easy Boot, because it is the basic Hoof Protective Boot and is reasonable priced, at approximately $42, so most Horse Owners can afford it. There are many other Protective Boots, some with additional features such as Velcro boots that go around the pastern for extra security.

The EasyCare Easy Boot is a very durable Urethane boot with a tension wire tightening device on front (where the toe of the hoof is). They are sized for the horse’s hoof so you have to have the right size. I find that if I use one size bigger and cut a small slit in the back of the Easy Boot, I can get them on the horse much easier. If I am using them to treat a injured hoof, such as in a puncture wound or using these boots in conjunction with gauze soaked in Epson salts to draw out an infection, I also use regular duct tape to wrap around the top of the EasyBoot and the horse's hoof and coronet band area for added security and to prevent dirt and debris from getting down into the boot.

EasyBoots are available from Horse.com http://www.horse.com/
I have been using Horse.com, formerly known as Country Supply, for many years now for much of my Horse Equipment and Supplement needs.

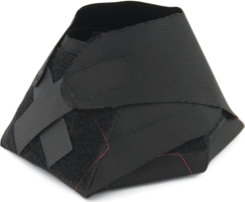
Another Hoof Protective Device that is lightweight and suitable for carrying into the back country in your saddle bags is called a Hoof Wrap. These are not advertised as boots but rather as Hoof Bandages, however I carry one in each of my saddlebags for use as an emergency boot on the trail. Using ballistic nylon and heavy duty stitching, the Hoof Wrap is well constructed and tough enough for repeated use. At approximately $20 they are inexpensive enough not to have one. Available from Hoof Wraps at http://www.hoofwraps.com/

See video below to watch me put on an EasyBoot and a Hoof Wrap on one of my horses.


Friday, February 19, 2010

Horse Health Care – Treating Ear Mites and Ticks


Does any of your horses shake their heads, rub their ears on posts or fences, or otherwise make you think they have an irritant in their ears? Take your index finger and run it around the inside of the ear and gently scrape then check to see if you can scrape out some mites or maybe even ticks if they are embedded too bad. You may be able to check with a flashlight to see if you can see any ticks embedded in the ears.

I use a pre-moistened diaper wipe/hand wipe type of rag to clean the inside of my horses ears. If I suspect mites and/or ticks, I’ll use a concoction of half campho-phenique and half mineral oil and drip that into the ears. It helps to do this as they are eating some grass so their head is down and they are more relaxed. Be careful not to place your head directly over theirs as they can rise up quickly and give you some free un-planned dental work. A horse’s head is generally harder than your jaw, I’ve come to know.

I buy a 6 ounce or so sterile water squeeze bottle, a bottle of campho-phenique and a bottle of mineral oil at the local drug store, then empty the sterile water bottle and re-fill with a mixture of half campho-phenique and half mineral oil. Used and cleaned out enema bottles work well too.

You will have to hold the tip of horse’s ear up and squirt a few drops into the inside of the ear flap so it can slowly drain down the sides. Don’t squirt a bunch if it directly into the ear canal. That’s worth repeating – don’t squirt a bunch of it directly into the ear canal.

The next thing you’ll have to do, pretty dog done quick too, is to get out of the splatter range as the horse will shake their head and undoubtedly fling mineral oil-campho combo in your direction, which I can tell you will spot up a new Silver Belly hat.

I also suggest asking your Vet about this. They have probably heard of this home remedy but may have some newer and natural type medication that they recommend you use instead.

Wednesday, February 17, 2010

Horse Training – Tying a Quick Release to a Trailer D Ring


From time to time when trailering horses from one place to another you’ll have reason to tie up your horse in order to do things. You probably want to have the trailer stopped before you tie your horse up to it, and un-tie him before you move the trailer again,.....come on that's supposed to be humor. Althought I've heard about a moron not closing his trailer door and losing a horse on the higway, I have never seen nor heard of someone driving off with the trailer and a horse tied to it. Anyway, most trailers have “D” rings, attached to the sides for ths purpose or for hanging buckets on, or, bars of a stock trailer can be used to tie a horse too.

I always tie horses either with a quick release, so in case that horse gets in trouble I can quickly get control, or as just a simple and fast way to un-tie.
I have also used snap-rings or The Clip type devices that feeds the rope around a stem or post that allows a gradual release of slack in case that horse pulls back.

In fact I have trained horses that pull back, not to be so ready to pull back by using one of these devices so when they do pull back they find a release and figure out that they didn’t need to pull back in the first place. Sometimes I'll intentionally spook a horse to faciliate him learning this. I like to think it teaches them to think.

I have used trailer bungees in the past, but will not use them again as they dry rot, the stiches come un-done and the hardware can break The idea is much the same as a snap-ring or The Clip. A horse can pull backs and the bungee stretches giving them time to think. But the bungee can break and fling a fast moving piece of hardware right at the horses head. Then you think the problems you had before with pulling back will be minor.

This is a better picture of The Clip, available at http://www.smarttieproducts.com/


Watch the video below to see my easy quick release knot on a Trailer D ring.


Tying Horse at Tie Rail with a Quick Release


Be around horses long enough and you’ll see some horse tied to a tie rail too long (with too much slack), where the horse steps over the lead line and pressure on the horse causing him to pull back and break something. You may have seen horses snubbed up too close to the rail. You may have seen someone tie knots that only a chainsaw could get it undone. I prefer to use quick release knots on my lead line so I can quickly and easily un-tie my horse.

Have you seen someone tying to a rail or fence using either one or both reins with the horse carrying a bit? Not good in either case. I’ve seen horses pull down fence panels or bang their teeth on bits pulling back. If you need to tie a bridled horse to a rail, then you should consider using a separate rope like a “get down” rope. If you are riding with mecate reins (sometimes called McCarthy reins because some people don’t pronounce Spanish words very well) then you have that extra 8 feet of rope to tie with.

The below video shows a simple knot I use when tying a horse to a tie rail. Remember that you may see the tie rail as a handy place to tie your horse,....he see's the rail and thinks "Ahh, a test for my strength or knot un-tying abilities".


Monday, February 15, 2010

Horse Health Care – Bran Mash


I have placed this post under a Horse Health Care title as opposed to a Horse Nutrition issue since the reason I give my horses Bran Mashes is for their Digestive Health. Plus it’s just good fun to watch them get that soupy bran all over their faces in their frantic efforts to eat every last bit of the bran mash.

Bran is a fiber, not having much nutritional value, but again I use it to help each Horse’s digestive system and also use the Bran Mash as a vehicle to get some psyllium into their system.

My recipe is to pour 8 cups of dry bran per horse into a large bucket. Then I add 1 or 2 ounces of Molasses per horse, 2 or 3 ounces of corn oil per horse and about 2 ounces of unflavored soluble fiber powder or psyllium per horse. I then add water and stir into a not quite soupy mess and immediately to my horses.


I give my horses this wet bran mash once a week, although sometimes I have been known to skip a week – but not very often. To tell you the truth, I can’t say if this does much good, but I feel better about do something to help their guts. Horsemen have believed in this for years and I have had very little problems with my horses with their gut, so I’ll just keep on doing it.


Sunday, February 14, 2010

Horse Training - Making Your Horse Safer for a Shoer


It the owner's responsibility to make his/her horses safer for a shoer (farrier). The last thing a horseshoer wants is to get up underneath a bronc and have that horse explode, pull back or (my least favorite) jerk his hoof away just after nails have been set. Imagine six horseshoe nails protruding through the hoof, not yet cut and clinched, then the horse pulls his hoof away raking the hoof through the shoer’s hands or along his leg. Good way not to make friends with that shoer; even better way to get a shoer to fire you as a client.

Your should be able to handle your horse’s hoofs whenever you want, picking them up, extending them to the front, all without your horse trying to pull them away. When you pick up that hoof (sometime I call them a foot, so bear with me) don’t let that horse get away with pulling it away. Hold onto it until you are ready to give it back. Sometimes that takes holding onto his foot for 5 seconds then giving it back, then increasing that until you can hold it as long as you want.

That horse should stand relaxed on three legs while you have the leg bent to the back as you clean the hoof or as the shoer trims the hoof, and also as that leg is moved forward so the shoer can put the hoof on a stand to clinch the nails and while he rasps the nails and hoof.

Your horse should be comfortable at the location he is going to be trimmed or shoed at. Don't take your horse to the shoeing stand for the first time when the shoer shows up. This should be a place he has been before and is used to. Remove all potential distractions there such as anything that the wind may move and spook him, or that may make noise.

Don't cross tie your horse for the first time when he is getting shoed. You can hold him with the lead line while the shoer attends to his feet. Train him to stand cross tied at another time. Considering using a snap ring, Clipit or other device that allows some slack if the horse pulls back - I have seen wrecks when a horse is cross tied and snugged down that could have been prevented with progressive cross tie training or use of a device that will provide slack as the horse pulls back therefore giving him some relief and time to think. The beginning of the video, below, shows what I use on my cross ties.

Until your horse does all this willingly, spend a few minutes (that’s all it takes) every day or every other day handling his feet. Your horse will be safer and your shoer will be appreciative.

Watch the video below to see a short session on handling a horse’s feet to make him safer. It only takes a few minutes of your time.


Saturday, February 13, 2010

Horse Health Care – Vaccinations


A regular vaccinations schedule should be a part of any health care plan for all horses. In fact, many commercial and private stables or boarding facilities require vaccinations on a common schedule.

When I ran a private horse facility, governed by rules including general health management rules and a vaccinations schedule, one of the harder things to do was to have horse owners keep their horses up to date on vaccinations.

The most common vaccinations for horses include:

Rabies. This is an annual vaccine, however I think some Vets will tell you that your horse will be fairly well protected getting this vaccine every two years. In my experience one out of every 20 horses has some sort of reaction to this vaccine which contains a killed virus in order for the horse to develop anti-bodies to this disease with is transmitted through a bite from an infected animal. This disease can be transmissible from horse to human. Check with your Vet to see if a rabies vaccine is indicated for your area.

Tetanus. This vaccine is given initially followed by a booster shot four to six weeks apart, then yearly after that. If you skip an annual vaccination then your Vet will probably have you go back to the initial shot followed by a booster. Tetanus is a bacteria that can enter a wound. You may remember stepping on rusty nail as a child with your Mom having a cow until she was able to get to the doctor for a tetanus booster.

Eastern and western encephalomyelitis. This disease is a virus transmitted by the mosquito. Some people think this disease is transmitted by birds,.......I just think they mistook Montana mosquitos for small birds. This vaccine is much like Tetanus where an initial vaccination is given followed by a second dose in two to three weeks or four to six weeks, depending on manufacture of vaccine used. A yearly vaccination is given after that. It is common for the Tetanus and Encephalomyelitis vaccines to be combined, sometimes with a vaccination for the Venezuelan strain of the Encephalomyelitis and called VEWT.

Rhinopneumonitis (Rhino). This is a viral disease that causes respiratory problems in horses. This is an annual vaccination but some Vets suggest a yearly vaccination in the spring with a booster in the fall. There are actually two forms of this disease. Consult your Vet to determine which version(s) your horse needs to be vaccinated against.

Influenza (Flu). This is a highly contagious viral disease that affects the upper respiratory tract of the horse. An initial vaccination is given with a 2nd shot three to four weeks later. Much like Rhino most Vets will recommend two vaccinations a year and sometimes three vaccinations depending upon if the horses travels a lot like a racehorse or show horse. It is common for the Rino and Flu vaccine to be combined.

West Nile Virus (WNV). This is a mosquito borne disease that affects the brain and spine through swelling. It has rapidly spread across the country since it was detected 10 or 11 years ago. I have read statistics that say one in every three effected horses will die. I have only seen one infected horse, and he made it, but it looked to be touch and go for awhile. Now this horse is roped off of and doing well. Lack of motor control, stumbling, loss of appetite and lethargy are all signs of this disease. Much like other vaccinations there are two shots in the initial series followed by one annual vaccination, although some Vets will suggest two shots, each one about 4 to 6 weeks before the onslaught of a rainy season and therefore mosquito season. I am lucky to live in an area devoid of a large number of mosquito so I vaccinate once a year, in April before the June rains.

Pneumabort K-1B is a vaccination for pregnant mares, given the 5th, 7th and 9th month of a pregnancy to prevent against abortion.

Strangles. This is a bacterial disease that is contagious and affects the horses respiratory tract with symptoms that include abscesses that appear along the lower jaw. Sometimes a tooth problem may appear (misdiagnosed) to be strangles. I have seen stables quarantined by the USDA for a positive strangles case. This vaccination requires three initial shots, followed by a yearly vaccination.

Potomac Horse Fever is a disease usually seen in the summer months which can cause high fever and diarrhea among other things with a chance of the horse also foundering. This disease has a high mortality rate. A annual vaccine is now available, however requiring an initial shot and booster in 3 or 4 weeks, then an annual vaccination.

The horse owner should consult with his/her Veterinarian to determine which vaccinations are appropriate to the area. There are many combinations of vaccinations and some Vets will let you give your own vaccinations thereby lowering your cost, except for rabies which is normally required by the state to be given by a licensed Vet. The risk is too great for your horses not to have them on a routine vaccinations schedule.


Horse Training – The Basics Under Halter

In our fast placed world we are often running from one task to the next without really stopping to think on the long term. No where is this more true than with horses.

How many times do you move a horse from the stall to the the paddock or from one corral to another just trying to get it done? We often let our horses get away with bad manners, although it’s our fault if they have bad manners because we have to let them know what we expect of them. Not only is this not doing them or us any favors, we are just simply misusing that available time and opportunity to do a short ground training session.

Anytime you get near your horses it should be a training session. If you are feeding them, train them to step back away until you have the hay in place. If you are trying to get through a gate and they are crowding the gate, make them move back before you enter. Eventually they will know what you expect, act that way and be just that much a better (and safer) horse for it.

Anytime you get a halter and lead on a horse, to move him from the stall to the wash rack or shoers stand, or, to another set of pens or corral, use that time to run through some basics. Horses learn through repetition. You will see how much faster they understand what you are asking once they are exposed to it many time over. Whenever I put a halter and lead on a horse, moving them from one place to another, I always take a few minutes to run through the basics things I need that horse to do under halter when leading.

Those things are: Lead up with me, staying at my back right hand; stopping immediately when I do; backing; standing still; dropping his head when I ask; moving his hind quarter over when asked; and, moving his front end ovr when asked.

You use the same pressure and release concept in all these tasks. Watch the video below and see once I get a halter on this green broke horse, what basic tasks I can run through in a matter of 2 minutes or so. Again, horses learn through repetition, use your time with them wisely – they and you will be much better for it.


Wednesday, February 10, 2010

Horse Hoof Care – Foreign Objects in the Hoof


I said in a previous post that sometimes I do not always clean out my horses’ hooves before riding them. I still check the hoof to ensure there is no foreign object in the hoof that has or can cause damage and lame the horse up and to ensure that if that horse is shod (has horseshoes) that they are still on securely.

From time to time when on the trail, especially in the Mountainous or rocky areas, your horse will pickup a rock wedged in the cleft of the frog or may get a sharp object, such as a mesquite thorn or even a nail, stuck into the frog or sole.

Rocks stuck in the hoof, upon repeated hoof strikes on the ground, can cause a bruise to the sole making the horse ouchy or even lame him up with a severe bruise – which we call stone bruises.

I ride mainly in desert areas with a high amount of spiny plant such as various cactus and mesquite bushes - lots of possibilities to get spines into Horse Hooves. Penetrations into hoof soles or frogs is much more serious than a stone bruise as an infection can set in. Sometimes the object breaks off, the sole or frog closes over penetration site and you never know that it occurred. Then suddenly your horse is lame for a few days to a month or even more. You can’t figure it out and weeks or months go by then the object comes out near the coronet band (where the beginnings of the hoof meet the hair on the leg).

Sometimes your shoer will see evidence of a penetration and can dig it out allow the infection to be exposed and you can draw it out using Epson Salts. Best way to use Epson Salts if your horse won’t stand in a bucket of water and Epson Salts is to pack a dripping wet poultice with Epson Salts and place on the hoof covering with a hoof boot.

When on horse back you can usually feel a change in the horse’s gait, clueing you to a possible object stuck in the hoof.

The top picture shows a small rock lodged into the Cleft of the Frog. Sometimes if you are riding in pairs, your partner can look at the hoof of your horse as it comes off the ground to see if it picked up a rock or other object.

The middle picture is a large rock my horse picked up when I was patrolling some mountains looking for poachers. I had to use my knife and another flat rock to act as pry bars to get this rock out as it was lodged very tightly between the inside bars of the shoe. I immediately felt this so my horse did not progress in this condition.

The bottom picture shows a mesquite thorn penetrating the frog. It didn’t penetrate very far and I was able to remove it intact and continue my ride.


Tuesday, February 9, 2010

Horse Hoof Care –Recognizing and Treating Thrush


The normal Horse has four hooves (that’s supposed to be humor). A Horse’s hooves, sometimes we call them feet, are at the same time both durable and susceptible to problems. Horseshoers have a saying that is timeless in its truth: “No Hoof, No Horse”. Horse owners must regularly look at their horse’s feet to keep on top of problems. One of the most common problems is Thrush, or to be more correct a “bacterial caused pre-thrush condition”, as real Thrush is mostly due to neglecting your horses feet over time.

Thrush is a common bacterial infection, normally affecting the Frog and the Cleft of the Frog which is the groove between the Frog and the Sole. Bacteria will grow in a damp or wet conditions, with damp or bacteria laden manure or dirt constantly packed into the hoof, this is a condition many horses get. Even in dry conditions a horse will step on manure which gets packed into the Cleft of the Frog and basically starts to rot. If left untreated the bacteria will grow into Thrush.

When picking out the hoof, bacteria will be noticeable by the nasty odor and may appear black…..smells much worse than your Grandpa’s spit can sitting in the Sun. Bacteria will turn good Frog and Sole in a powdery like substance and easily break off parts of the hoof sole and pieces of the frog.


Treatment includes prevention with regular Hoof Care by cleaning (picking the hoof) paying particular attention to cleaning out the Clefts of the Frog. Some of us don’t bother to clean the hoof prior to riding as the material (dirt and manure) packed into the sole acts as a natural cushion for the hoof, however bacteria needs an oxygen deficient environment to grow. Cleaning the hoof is and exposing the bacteria in the hoof to oxygen, then riding, often clears it up.

Commercial Thrush treatment medicine like Koppertox or a home remedy such as 50% diluted bleach will make short work of most Thrush cases. Sometimes it is necessary only to treat once. In fact, I don’t think I have ever had to treat a hoof with bacteria more than once.


Common Horse Problems – Colic.


Colic can be broadly described as intestinal problem causing a large amount of pain to a horse. There are many different types of Colic but I’m only going to discuss the types that I have experienced in horses.

Sand Colic is a common type of colic resulting from sand accumulating in the horse’s intestines, which I’m going to refer to the stomach and intestines as the gut to keep it simple, which suits me as I am often referred to as a simpleton. The horse owner can and should take steps to prevent the horse from digesting or accumulating sand, such as not feeding on the ground but in tubs, bins or feeders. Even then horses natural graze so they will spend a great deal of time with nose on the ground searching for and picking up left over pieces of feed and therefore in-take sand into their gut. A common test to determine amount of sand in the horses manure (manure in the jar test-click here to go to this post) can be done to see how much sand is in the horses gut and therefore potential for sand colic. Some horses may have as much as 80 pounds or so in their gut!

Sand Colic can cause blockages and a gut rupture or tear, or more commonly, causes such pain as to make the horse throw himself down over and over again and end up twisting a gut. The twisted gut blocks blood supply and the portion of the gut begins, rapidly, to die. This is fatal, unless surgically treated immediately, although it can take a horse several days to die. This is a heartbreaker. I’ve had to put down a young very promising horse. I have also seen twisted guts where the horse goes through short periods of relief which gives the horse owner a false sense of the horse getting better.

Prevention is key and that includes feeding smaller amounts of hay several times a day, rather than one or two large feedings, and, plenty of fresh, clean water for the horse to drink. Some horse people believe in regular treatment through feeding bran mashes or a commercial product such as Sand Clear or Miracle Sand Out pellets. I’m one of those. If a horse of mine exhibits signs of sand in the gut such as very loose manure or diarrhea, I’ll place him on a seven day regime of the above mentioned products, which usually clears up the lose manure or diarrhea in a week. I also routinely give bran mashes, every 7 days or so, which are dry bran mixed with a little corn oil, molasses and Psyllium (Fiber) to a watery mix.

Gas Colic is another common type of colic, resulting in gas buildup in the gut faster than it can be relieved, most likely caused by feeding large amounts of rich feed. First cut alfalfa, not slowly integrated into the feeding program and Sweet Feeds in my experience are two more likely causes. Another cause is rapid changes to the diet. Prevention again includes feeding more often in smaller amounts, slow changes to different feeds such as different cuts of alfalfa.

Symptoms of both Sand and Gas Colic may include the horse standing stretched out; pawing the ground; ears back and eyes looking listless; biting at his side or looking at his sides; trying to lay down or laying down, getting back up again, and laying down again – or actually throwing himself down to the ground.

Treatment of Colic. You need to call a Vet immediately. Be prepared to articulate the symptoms that the horse is showing. If the Vet comes out to look at your horse he/she will examine the horse, will probably administer Fluxomine / Banamine by IV, which is injected directly into a vein for immediate effect, then probably put a tube through the nose into the stomach and pump a water / mineral oil mixture into the gut in an attempt to get any blockages moving and reduce toxins in the gut.

Prior to the Vet coming out you should probably lead the horse around at a walking pace for two reasons, 1 – to utilize the natural movement of the walk to add digestion and 2 - to keep the horse from throwing himself down and greatly increasing the chances of a twisted gut. Some Vets will palpate the horses rear end, that means stick a gloved hand into the butt to see what may be going on in that last part of the intestines. Most Vets will not give the horse a water/mineral oil or straight mineral oil enema, however I think this option should be considered and almost always done – what’s another $10 of mineral oil after the Vet made a Farm Call at 2:00am?

A lot of horse owners keep Fluoxomine/Banamine on hand and will treat the horse themselves if a Vet is not readily available or in hopes of resolving the colic before a Vet is necessary. I’ve treated a lot of horses with symptoms of Colic myself although I would never hesitate to call my Vet and arrange a Farm Call. Sometimes it’s throwing the dice either way, but the sooner the horses receives treatment the better the chances for a recovery.


Monday, February 8, 2010

Horse Health - Worming Horses


One of the hardest programs to manage when I ran a large private horse stables was to get all the boarders and their horses on a routine worming program. Despite the rules, despite automatically adding the cost of wormer to their board bill, owners had a hard time abiding this important and routine agenda of horse health. Some of that was surely their inability to give a horse wormer which they ain't necessarily fond of to begin with.

Anthelmintics, or horse wormer needs to administered to each horse not only on a routine basis but on a program designed to be effective against the parasites and minimize the chance of the parasites being resistant to the worming product. It is not simply a matter of picking up a tube of wormer at the feed store several times of year. Worming products need to be rotated to ensure effectiveness against various parasites.

The various worms that we use a worming program to combat include:
Tapeworms. Tapeworms can contribute heavily to colic. A horse affected with Tapeworms may appear to be poor (malnourished) as they affect the horse’s digestion process. I have seen a horse heavily infected with Tapeworms colic bad after being wormer for the first.

Bots. The adult Bot looks like a potatoe bug and lay their eggs on the hair of the horse. As the horse licks itself they ingest these Bot eggs which eventually travel to the stomach and can cause damage to the horse.

Large Strongyles. Found in the large intestine, adult Strongyles burrow themselves into the large intestine walls. Strongyle eggs are passed in the manure where they hatch and are ingested by the horse completing this cycle. Strongyles can damage the blood vessels and cause colic and blood clots.

Pinworms. Picked up by horses through feed, water and from the ground, Pinworm eggs can cause a horse to rub his tail against a fence or pole and at worse damage the tail or at least rub hair off.

Roundworms: Picked up by horses grazing, these worms are found in the intestines. As adults, roundworms are normally found in the in the small intestines and sometimes passed in the manure. Traveling through the blood supply, the eggs of Roundworms will travel to the lungs and the liver affecting the health of the horse.

Worming schedules. There are many different worming schedules based on the area you live in and whether your horses are turned out with others and on pasture. The most common worming schedule is a bi-monthly schedule, giving a different wormer every other month. Most Horse Supply Product catalogs with feature several different such schedules. One schedule may be:

Jan/Feb – Pyrantel/Praziquantel (for Large/Small Strongyles, Roundworms and Pinworms – Praziquantel additionally for tapeworms)
Mar/Apr – Fenbendazole (for Large/Small Strongyles, Ascarids and Pinworms)
May/Jun – Ivermectin (for Large/Small Strongyles, Ascarids, Bots and Pinworms)
Jul/Aug – Pyrantel/Praziquantel (for Large/Small Strongyles, Roundworms and Pinworms – Praziquantel additionally for tapeworms )
Sep/Oct – Fenbendazole (for Large/Small Strongyles, Ascarids and Pinworms)
Nov/Dec - Ivermectin (for Large/Small Strongyles, Ascarids, Bots and Pinworms)

With the introduction years back of combination worming products, I have opted for a quarterly worming schedule. When I bring a new horse in, I quarantine him for three weeks and catch him up on the worming program as well as vaccinations and a Coggins (EIA) test.

Feb Fenbendazole
(Safeguard or Panacur, I’ll rotate from year to year which brand)

May Praziquantel with Moxidectin
(QuestPlus)

Aug Ivermectin
(Zimectrin)


Nov Ivermectin with Praziquantel
(Zimectrin Gold)

Be careful to administer the correct amount of wormer to your horse. Use the scale on the stem of the worming syringe to set for that horse’s weight. It is always a good idea to get a fecal egg count for parasites by your vet before administering wormers for the first time to a new horse. I said before, a horse being wormed for the first time may drop a bunch of parasites which can cause a blockade and colic that horse. Talk to your Vet before giving wormers to a Broodmare in foal and to standing foals.

I do not use daily pellet wormer. I know good horse people that do, but it seems to me like it’s a lot easier for the parasites to build up a resistance to daily, therefore a lesser strength product. Again, talk to your Vet, present him/her with a worming schedule and ask their opinion for that area and environment before beginning your worming program.


Common Horse Problems – Sand in Gut


When horses eat off the bare ground they easily consume particles of sand or dirt. A way to mitigate consuming sand would be to keep feed of the ground by using a hanging feeder, large feed bucket and/or a mat on the ground. Most tack or feed stores will have or can order stall mats for this use. A trip to your local auto parts store to buy a truck bed mat is another solution. Even then, horses have that danged particular habit of tossing their feed out of most containers in order to get to the soft hay residue at the bottom. If you horse regularly eats off the ground, has loose manure or seemingly has gut aches more often that others there is a simple test you can do to see how much sand there is in the horse’s gut. You’re going to need a clear jar and lid, such as a Mason jar for canning.


Collect 6 to 8 balls or ball sized elements of manure that have not touched the ground and place them in the jar. Fill the jar almost full of water. Place the lid on the jar then shake up for 20-30 seconds then let stand. Within 20-30 minutes or so, the sand will separate from the manure and be evident in the bottom of the jar.


The jar in the picture LEFT shows A LOT of sand contained in those balls of manure. The Vet told us there may be as much as 80 lbs of sand in this horse’s gut. The jar in the above picture RIGHT shows a fairly small degree of sand in the manure. You should always consult a Veterinarian, if not in person then at least over the phone. We have a great vet. She drives near 100 mile round trips to get to us – couldn’t get by without her, but that’s another story.

We were already feeding this horse in a large feed bin, so what we did to treat this horse eating sand was to give him a dose of pro-biotics to ensure he has good enzymes in his gut, then put a scoop of Sand Clear Pellets in his morning grain for seven days, then continue to monitor his manure. This seemed to clear up his loose manure. If this is a chronic case, you may have to repeat this treatment more often or even one week per month.


Common Horse Problems – Loose Manure


Horse owners should be checking the condition of your horse’s manure to give insight into what problems the horses may be having.

Manure should be dropped in small balls, a little bit bigger than a golf ball. I don’t like the analogy since I can’t stand golf.....just don't see the point in it. Anyway, the balls should be loosely formed, can and should break apart under a little pressure and should be somewhat moist. The average horse, depending upon activity and feed, should drop about 7 to 14 piles a day, although it is not unusually for a horse to drop even more.


The photo on TOP shows manure that is too loose possibly indicating problems for the horse. The photo on the BOTTOM depicts normal manure as firm, moist balls.


Possible problems the horse may be experiencing, evident by the loose manure, could be: poor digestive enzymes in his gut; lack of worming – that is de-worming the horse; poor quality feed; horse experiencing stress; or eating sand - too much sand in his gut. Or it could be a combination of problems.


If you regularly find loose manure in a corral or paddock occupied by more than one horse, you can check under the horses’ tails looking for loose manure residue to find the guilty horse.

One of the first things I do when I have a horse with loose manure is to check to see how much sand is in his manure. I’ll cover that fun test in another post.


Sunday, February 7, 2010

Giving Your Horse Paste Products


The Horse Owner will, from time to time, need to give his horses paste products. Sometimes this will be done as a periodic routine such as worming your cavvy or it may be specific needs such as administering a pain reliever such as Bute, giving an electrolyte supplement or a pro-biotic supplement.

The common technique of placing the paste on the back of the horse's toungue seems to give the horse a better chance of spitting it out, especially if the owner did not ensure the horse's mouth is free of hay residue before giving the paste product.

I like to place the paste product inside the horses mouth between his cheek and back teeth. That seems to keep my horses from spitting any paste out.

Ensure you follow the directions on the product tube. There will be a measuring scale and locking device on the stem of the paste syringe so the owner can give the proper amount.


The Basics of Horse Nutrition - Joint Supplements


At some point in the horse’s life the owner may consider putting the horse on joint supplementation. Not all horses need joint supplementation but some of the one’s that could use it are: horses that have been started very young maybe before their bones, cartilage and tendon endings reached full maturity – race horses come to mind; horses that been used hard and regular for a long time; horses that have suffered some trauma or injury to their joints; and, very old horses.

In developing what I think I know about joint supplements, I have basically used three sources: horse experienced students in Ruminant or Equine management or Ag related studies at the local University; Scientists at a human nutritional supplement manufacturing company; and, personal experience from using and watching horses placed on joint supplements.

Most of the horse joint supplements on the market today will contain some of all of the following ingredients: Glucosamine, Chondroitin, Methylsulfonylmethan (MSM), Hyaluronic Acid, Vitamin C, Manganese, and Silicon. The following is a short description of each:

Glucosamine is an amino acid that the body produces naturally and is an ingredient used in the building and repair of cartilage.

Chondroitin is found in the cartilage, helpful for a healthy cartilage and is thought to help prevent or slow the deterioration of cartilage.

Methylsulfonylmethane (MSM) is sometimes thought to be a pain reliever but most Vet’s will tell you that it is an anti-inflammatory agent.

Hyaluronic acid is thought to be related to the production or retention of the natural fluid found in the joints.

Vitamin C, Manganese, and Silicon are thought by some to provide additional nutrients necessary for optimal joint health.

So do Joint Supplements actually work? And what do all these chemicals or ingredients mean to the Horse Owner wanting to put their horse on Joint Supplements.

The short answers are: University students tell me there are virtually no independent studies on whether or not joint supplements work on horses – the key word here being independent studies. However I have been consuming pharmaceutical grade Glucosamine, combined with Vitamin C, and found a very significant reduction in pain in my knees. I have asked questions of scientists from the company that manufacture this product and they tell me that they know Glucosamine works but do not include the other common joint ingredients either because the price would be too significant or they cannot reasonable prove the other ingredients work. As far how joint supplements work on horses, I have an old roping horse, coming 27 years this spring, and who has had several injuries in the past, on joint supplements and I see a good deal improvement. More athleticism and less toe drag on his previously injured front leg.

Aside from structural damages which any supplement probably won’t affect, I believe that good quality joint supplements can give your horse a chance at healthy joints and a possible reduction of pain. This may make a horse useable again if he wasn’t previously. You should be prepared to give any test a decent length of time, such as maybe a month or more before you make a final determination if the product helps.

I have used many products on different horses over the years. The product I am now using is Corta-Flx Pellets. I use pelleted supplements rather than powder as I think there is less waste. Corta-Flx, while not technical manufactured with Glucosamine, Chondroitin, or MSM, the company uses isolates from these ingredients producing smaller molecules for better assimilation and utilization. This product also has Hyaluronic Acid.


At roughly $25 for a 40 day supply, I think it is well worth the test on your horse.


Saturday, February 6, 2010

The Basics of Horse Nutrition – Processed Feeds


Processed Feeds are not always but usually pelleted feed usually purchased in 50 lb bags. Major manufactures of processed and pelleted feed are Purina, Nutrena, MannaPro and Hi-Pro. One benefit from feeding these products are that they are usually fairly balanced and can provide the horse with nutrients such as vitamins, amino acids and minerals that the horse may not get on pasture or from dry hay. However processed and pelleted feed is not a completed ration. It should be used only to supplement hay.

The daily amount given to a horse should be spread out through the day with at least two feeding sessions. Most feed sources will tell you not to feed more than 5 pounds at a time and that processed feed should not make up more than 50% of the horses feed (in weight). Other sources will tell you to feed .5% to 1.5% of the horse’s body weight in processed feed (also called processed grain). If you fed 1.5% body weight of a 1,000 lbs horse – this would be 15lbs of processed grain a day. Not only do I think these numbers are too high, I think they are crazy high.

I think 2 lbs of processed feed at any given time is enough and should make up no more than 20% of the horse’s daily nutrition content. You have to remember that horses did not come into this world being feed by humans. They are designed to eat (graze) small amounts of forage all day long. When we insist on putting them in a pen and feeding dry hay in large amounts plus processed (and therefore not natural) feeds then we increase the likelihood of feed related problems like colic and founder.

Having said that, I do feed processed feed. Hi-Pro Opti 12 (12% protein) to be specific, but in relatively small amounts (about 1.5 lbs per horse twice a day). I feed Hi-Pro as opposed to the other brands simply because friends of mine own a feed store. That’s the brand they sell and I want to help them out, plus the cost savings is greater than the quality difference between Hi-Pro and Purina Strategy which I used to feed.

I feed process grain for several reasons: I use it as a medium to introduce other products like joint and hoof supplements, and it gets the horses used to processed feeds so I can more easily adapt them to a greater percentage of processed feeds when their energy needs go up after long work days or being on the trail for a substantial amount of time, or packing into the back country where grass is sparse and bringing more feed in is a necessity.

Sometimes if I’m on a horse all day long, where his energy needs may almost be twice what he normally gets, I’ll increase his processed grain slightly over the next couple of feedings and well as increase his grass hay. I have also used corn oil quite a bit in the past to provide the horse with a 100% digestible energy source. When I use corn oil, I’ll pour no more than about ½ cup into their processed grain ration. Corn Oil has more than doubled in the past two years, so I sorta came off using it routinely.

I don’t recommend feeding sweet feed. That is processed grains made heavy with molasses, as the chances of that feed molding are much higher than the dryer grains.
If you introduce new feeds to your horse and even different cuts of hay, Alfalfa or grass, you would be wise to slowly integrate- let the horse’s gut and digestive track get used to it.

For more information on Processed Pelleted feeds visit the Feed Manufacturers links.


Halters and Safely Haltering a Horse


Horse people are pretty particular about their equipment and the most basic of horse equipment is a halter. Halters are generally of two types, webbing halters with metal or brass hardware using a buckle to secure the halter on the horse and rope halters which are tied to secure it. I like minimal hardware so I exclusively use rope halters.

I also use tied in lead lines,…. that is lead line without a snap. Snaps usually have a spring loaded mechanism that eventually gets caked full of sand plus springs can lose their strength. When using a lead line with a snap, that snap becomes the weakest part of the halter and lead.

I have seen people put halters on standing directly in front of the horse. It’s only a matter of time before that horse’s head comes up and gives you some free dental work if it doesn’t knock you out. Instead approach from the side holding the halter under the neck, reach over the horse’s neck and bring the long line of the halter over the horse’s neck across his poll (behind the ears), then slip the nose band of the halter over his nose, snug it up and tie the halter. When you tie the rope halter, use a half hitch and ensure the end of the halter long line is facing to the rear – towards the horse’s butt,….that way the horse can’t move his head quickly and end up poking himself in the eye.

You can see a demonstration in the video below.


Friday, February 5, 2010

Horse Hoof Care – The Basics: Choosing and Keeping a Good Horseshoer/Farrier

Finding and keeping a good Horseshoer/Farrier is essential to having sound horses to ride. There seems to be a lot more part time horseshoers than full time horseshoers available. Full time Farriers will usually maintain and keep a regular schedule where you can be assured he/she will show up on time and trim or shoe your horses. Some part time Farriers have to work around their day job schedules and other commitments where it becomes frustrating to get your horses trimmed or shoed when necessary.

For Unshod Horses, or horses that are not going to have horseshoes nailed on, I am often asked “how often is it necessary to get my horse’s feet trimmed?” That depends upon a lot of factors such as what time of year it is, as cold weather generally slows down hoof growth. Another factor is if the Farrier is trying to correct a previous problem which is usually caused by lack of consistent Farrier care. Generally a horse needs to have his hooves trimmed every six to eight weeks in order to best maintain healthy feet and keep on top of potential problems.

I would look for a Farrier that is experienced and probably belongs to a professional organization such as the American Farriers Association (in fact you can get Farrier contacts through the AFA website: http://www.americanfarriers.org). It is important that your Farrier continues his/her education through professional clinics and such, and it is very important that your Farrier that is a good hand with horses although it is the horse owner’s responsibility to make the horse safe for the Horseshoer. You won’t keep a Farrier very long if that horse is not gentled enough to handle the feet. You shouldn’t keep a Farrier that is rough with your horses or punishes them as opposed to correcting them (Yes Matilda there is a difference).

You will want to be able to discuss your horse’s feet. Knowing the anatomy of the feet is a start. The basic parts of a Horse’s hoof are shown in the below pictures.


horse hoof care, horse hoof problems, parts of hoof, toe, bars and heel
horse hoof care, horse hoof problems, parts of hoof, frog and sole