Showing posts with label horse tack. Show all posts

Friday, August 22, 2025

Check your Bits for wear and damage


I almost always wear gloves when handling horses. Mainly because my hands have been chewed up over the years, splitting from dryness, being cut, etc., and I always check out my bridles before I put one on a horse, making sure it is still in good working condition. Part of that is running my hand over the bit mouthpiece and swivels. A couple days ago, I happen to grab a bridle with a snaffle bit, to put on my horse Hays, with a bare hand and I felt burrs on the snaffle mouthpiece. This was a snaffle with a solid copper mouthpiece. Copper is a bit softer than steel or sweet iron and I reckon after years of riding in it, it just got a chewed up some. So I changed out the bridle for an almost brand new snaffle bit to ensure my horse's comfort.

When I was running annual arena challenges, I would often get donations from horse tack distributors and every once in awhile, not often, but it happened where I would receive bits that were pretty cheap. Like the snaffles bit that are offered for $20 or $30.  I keep these lower quality items off the prize table and would just donate these bits to a horse rescue with the caveat that these bits were low quality and be careful using them. <br><br>

While some may balk at $120 snaffle bits, it does pay to buy quality gear. This may be more apparent when buying braided rawhide hackamores. Beveled strands of rawhide and tight braids on a quality hackamore (bosal) from well known braiders, and taking care of those works of art, will pay off. You don't want to buy a cheap $60 rawhide bosal with rough parts that would sore up a horse's nose. I realize the many people can't afford really nice gear - I've been there and it's taken me a long time to accumulate really good equipment - but quality tack with usually last a lifetime.

I think my horse Hays was supervising the bridle/bit choice when I discovered the burrs on my decades old snaffle with solid copper mouthpiece.


Tuesday, October 11, 2016

Breast Collar Fit Question


I received a YouTube Video Channel comment from 3d3nd3n1 regarding a video on Breast Collar fit saying, "Hi, great video. I just purchased a pulling collar but am not sure how to affix it to the swell of the saddle. Can you do another video and explain that? If it isn't too much of a bother."

I don't have a fixed, U shaped Pulling Breast Collar currently in my tack room. But the one you have is likely attached through the gullet and around the swell of the saddle with a strap that has a O or D ring at one end. You feed the strap through the gullet around the swell then back through the D or O ring, tighten it up then take the running end of that strap to the D ring or buckle attachment on the breast collar.  Similiar to the picture below. There may be different attaching point on your breast collar. Some of the attachment straps (the ones running through the gullet of the saddle) may have a snap hook to clip to the D ring on the Pulling Collar and a buckle for adjustments somewhere on the attachment straps, rather than a buckle on the breast collar like the one on the photo.  


You can see that the saddle above does not have breast collar attachment D rings. Many saddles have D rings that are positioned too low to keep the breast collar off the chest and positioned in the natural "V" between the horse's chest and the neck. If your saddle has Breast Collar attachment D rings that are high enough on the saddle, like on the Wade saddle in the photo below, you may be able to attach your Pulling Collar at these points if that still allows the breast collar to be high enough off the chest, but low enough not to choke the horse.


If you do have Breast Collar attaching D rings on your saddle that you want to use but the breast collar position is still too low, you can run a strap from the breast collar D rings over the horse's withers to bring the breast collar up and into the correct position which is more comfortable to the horse, doesn't affect his stride nor rub his chest, and isn't high enough to put pressure on his throat.

Some makers offer straps for just this purpose (breast collar over the withers) but you can certainly make an expedient strap. While I have seen riders use hay twine for this purpose, something flatter like a saddle string or a wider piece of leather would work better I would think.


Once you have your Pulling Breast Collar fit just right, check to see that there is some play in the breast collar at the point of the chest where the breast collar comes together. I like to have 2-3 fingers width play or looseness here. See photo below.  I reckon if you had really thick fingers, you may be able to use one finger. Don't laugh, I used to know a gent whose fingers were so thick we called him "sausage fingers".


I hope this helps you fit your Pulling Collar in the absence of a video. Safe Journey.


Wednesday, November 11, 2015

Tack Tip - Crusty Cinch Latigos


Here's a short tack tip on storing your cinch latigos (cinch straps) so they remain more pliable. Of course, we should be cleaning and treating our saddles and tack. But sometimes we (or maybe just me) are neglectful of our tack or the environmental conditions just get ahead of us.

I usually use a diluted mix of household dish detergent and a rag to clean my saddles and gear. Sometimes I'll need to use a dish brush on my gear as well to get the sand and dust out of the crevices.  Don't tell my wife I use dish brushes - I've been blaming the dog when dish brushes disappear from the sink.

Then I apply 100% Neat's Foot Oil to all the leather. On my latigos, this will keep them all soft and pliable.  But I also use this technique in the photos below to secure cinch straps, both on saddles I routinely use and those I have stored for longer periods of time.

Careful as you might be, sometimes the latigo drags in the dirt and combined with salt from the horse sweating, a cinch latigo may get stiff and crusty. So for the last 15 years or so, I have been in the habit of tying up most of my latigos in the manner shown below. It pretty much works to keep the latigo flexible and easy to weave though the cinch D ring and saddle D ring.


In the photos above:  Step one - I loop the latigo through the D ring twice, like you would to situate the latigo for easy pulling out and running through the cinch D ring.  Step 2 and Step 3 - I wrap the running end of the latigo around section looped through the D ring, and Step 4 - I stick the end of the latigo through the bottom.


This helps keep the latigo from getting loose and catching on something, or dragging in the dirt, and the whole process of bending and wrapping the latigo helps debris fall away from it, and keeps it pliable.  This is also a good way to store a  cinch strap on a saddle that may be put up for a while.  


Tuesday, April 21, 2015

Small Saddle Bag - Sanctuary Leather


Large conventional saddle bags are sometimes too big and bulky for recreational trail riders or endurance riders. And for some people, I imagine that routing the saddle strings through the saddle bags to hold it to the saddle in back of the cantle is time consuming.    I have also seen many show type saddles being used for trail events and competitions that do not have saddle string.  saddles.  But I have seen rider's with cell phone pouches on their saddles and also riders with a small horn bag for carrying a water bottle, human and horse snacks, and other incidentals.

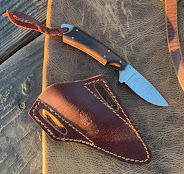
Never a big fan of nylon tack, I asked a maker in San Antonio, Texas to build some small saddle pouches that I can use as gift's or awards in competitions I will run later in the year. Dennis Holloway, a disabled vet, owns and operates Sanctuary Leather making everything from handgun holsters, to knife sheaths, belts and a wide selection of small leather items.


I contacted Dennis and we went back and forth on some designs and led to a delivery of four mall  saddle pouches.  I asked him for saddle string slots at the top, so I can choose which one's to secure using saddle strings and which pouches to install a slotted concho and snap on the back to attach to either D rings for rigging or to the small D rings that sometimes are placed underneath the conchos.

The picture at top left is one of the small saddle/medicine pouches with a slotted concho and a saddle string holding a snap to attach it to a small D ring on the back of the saddle.    

If you are looking for a saddle pouch like this, or anything else, Dennis' turn-around time is pretty dog gone short and his prices are more than fair.

For the saddle pouches in the picture at rights, with your choice of a dark, medium or natural finish, Dennis charges around $45. He can also do carving and stamping as well.

 The saddle bags in the picture at right are 6 inches long, 5 inches wide and 2.5 inches deep.


Saturday, March 22, 2014

Why Use Tie Downs on Horses?


Ellison wrote to ask about Tie Downs. "Thanks for your information and videos. I remember some topic and often go back to look. I bought an older horse, 15 years old, who was used for team roping. The owner told me that I should use a tie down on him. He showed me how he connects this underneath the bit and head harness. I bought this horse because he seemed really gentle and calm for use as a pleasure horse and want to know if using this tie down is necessary for control?"

Basically the tie down is a nose band connected with a strap to the front D ring on the cinch - which the correct way to rig a tie down.  Although over the years I have seen people rig this differently, from the nose band, through the main  ring on a breast collar to the front D ring on the cinch, and actually a few times rigged straight from the nose band to the main ring on the breast collar.  Team ropers use it on their horses to give the horse something to push or brace against when turning or stopping under the jerk and load of a roped steer.

I have used a tie down before when I was team roping. I quit using it when I didn't think it was helping my horse and just felt it was wrong for me and my horse. Tie downs will work for the purpose of something for the horse to push against and be better balanced for the jerk of a load on the rope otherwise the very best team ropers who are also very good horsemen wouldn't be using them. But is important that the tie down is adjusted correctly which will allow your horse to push his nose out far enough in order to run in a balanced manner, and the nose band should be positioned above the soft cartilage of the nose to keep from doing any damage.

I think I would ride your new horse, maybe first in a controlled area like a round pen or arena, do some transitions, work up against the fence doubling him, and on backing him as to see what he is like without the tie down. Maybe the previous owner didn't know any other way but to use a tie down. If the horse is throwing his head it may not be because of a lack of a tie down,.....it could be an ill fitted bit or a bit that causes pain. Or it could be a learned reaction to get away from rough or quick hands. If you watch a horse that is being ridden with rough hands, as soon as the rider starts to pickup on the reins that horse's head may go up trying to alleviate the pressure and pain that he is expecting to come next.

Good luck to you and I'd like to hear how you are doing with this horse if you ride him without a tie down.